Do you love using Pinterest on your WordPress website? If so, you should consider tracking all of your statistics by using Pinterest analytics. Pinterest analytics is a great tool that will show you all of the images you pinned from your WordPress website and how they are performing.
To use Pinterest analytics, you will first need your website to be verified by Pinterest.
Pinterest is one of the largest social media platforms. It is only behind platforms like Facebook, Twitter, and Instagram, but it is still a great place to interact with your community, especially if your website produces really great images.
Today, I will demonstrate how to add Pinterest analytics by verifying your WordPress website on Pinterest.
Why Add Pinterest Analytics to WordPress?
Social media is crucial to growing in today’s world. Almost every person and business uses social media to share their activities with the world. Many websites have marketing teams dedicated to specific platforms and the more platforms you use, the better the chance your website will succeed.
Facebook alone has over 2.5 billion users around the world and there are plenty of other platforms to choose from. The larger the audience pool, the better the odds of your content getting noticed by the masses.
This is why a lot of users will add Pinterest sharing buttons to WordPress, which often includes most other platforms as well.
Like many other social media websites, Pinterest can be used as a way to connect and further communicate with your community. Social media is a great way to increase your engagement with visitors, but you need to make sure that what you are doing is working.
Images, in particular, have been found to be the most engaging form of communication with followers.
That’s where Pinterest analytics comes in. This tool will show you how every photo you pin on Pinterest is performing including stats like Pins, Pinners, Repins, and so much more.
We are going to use a simple plugin that enables us to easily add the code we need to track Pinterest analytics.
Let’s take a look at the plugin together and then we will go through the process of adding Pinterest Analytics to WordPress together.
Insert Headers and Footers

Insert Headers and Footers is a simple to use plugin that allows you to easily add relevant code to your WordPress website header and footer areas. With this plugin, you can insert code like Google Analytics, custom CSS, Facebook Pixel, and even Pinterest Analytics to the WordPress site header and footer. There is no need to edit your theme files if you install this plugin.
As stated above, the plugin is simple, lightweight, and easy to use. Once installed, it gives you an area to easily add all sorts of relevant code to site headers and footers. Insert Headers and Footers allows you to add all the scripts you want in one place, instead of trying to deal with several different plugins at once.
The plugin comes loaded with features. Some of the main ones include:
- Easy to set up
- Simple to add scripts
- Easily insert header or footer code
- Add Google Analytics code to any theme
- Add custom CSS across themes
- Copy and paste Facebook pixel code
- Insert any code or script, including HTML and Javascript
- How to Add Pinterest Analytics in WordPress
Using the plugin above, I will demonstrate how to add Pinterest analytics by verifying your WordPress website on Pinterest. There are no additional plugins needed, but using a plugin like this one makes the process quick and easy.
You will need your Pinterest account to verify your WordPress website and activate Pinterest analytics. The process is very straightforward and should not be any trouble to set up.
Note: The process below assumes you already have a Pinterest account and want to attach it to your WordPress website and track those analytics.
Add Pinterest Analytics to WordPress
Step 1: Log In to Your Pinterest Account
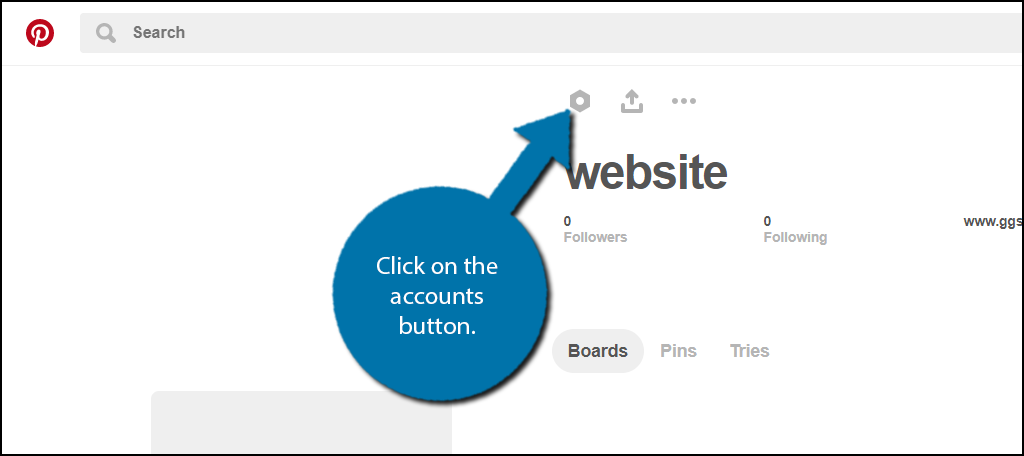
The first thing you need to do is log into your Pinterest account. Once logged in, click on your name. Click on the accounts button.
Step 2: Click on the Profile Option and Confirm Website
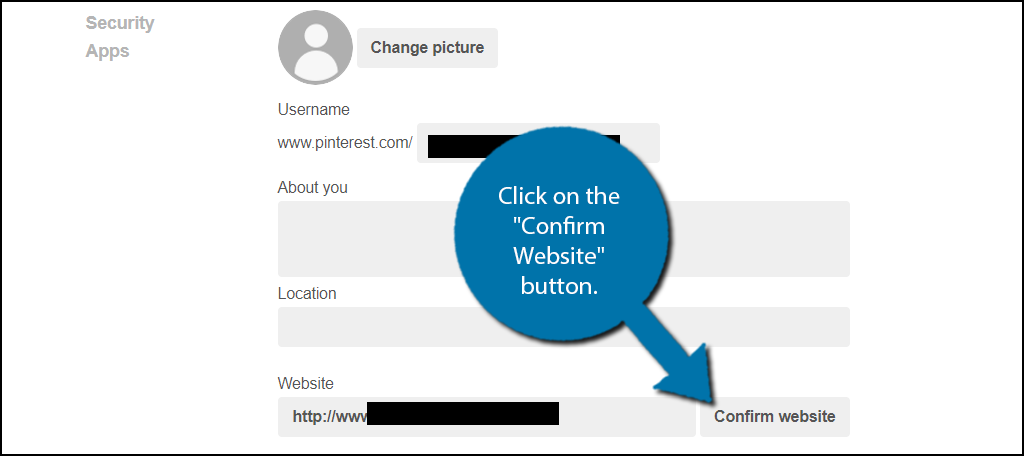
Click on the Profile option. At the bottom of this section, you will see your website. Next to that, you will see the “Confirm Website” button. Click on the “Confirm Website” button.
Note: It is possible to claim more than one website per account. This is intended for account creators that have more than one website or they have some type of partnership with another website (like an influencer).
Step 3: Copy the Meta Tag in the Popup Box
A popup will appear containing the meta name tag. Copy the tag and head back to your website, but do not close this tab. You will need to click the “Finish” button when you are done.

Note: This meta tag will only work on the website that you confirm. Therefore, you can rest easy that no one can steal this information for their own gain.
Step 4: Install and Activate the Insert Headers and Footers Plugin
If you are not a fan of adding another plugin, feel free to add the meta tag manually in your theme files if you know how to. It’s actually pretty easy to do and should only take a minute or so.
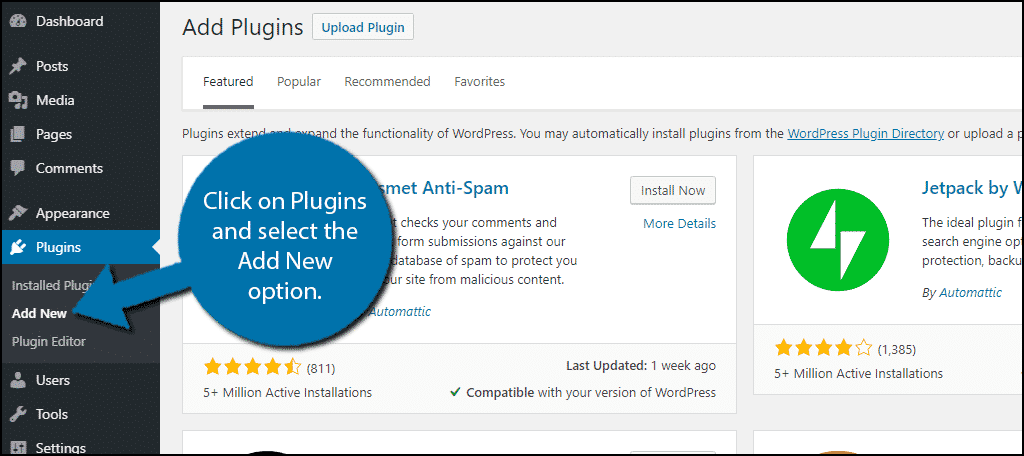
Go to the Plugins page in the WordPress admin dashboard and click on the Add New option.
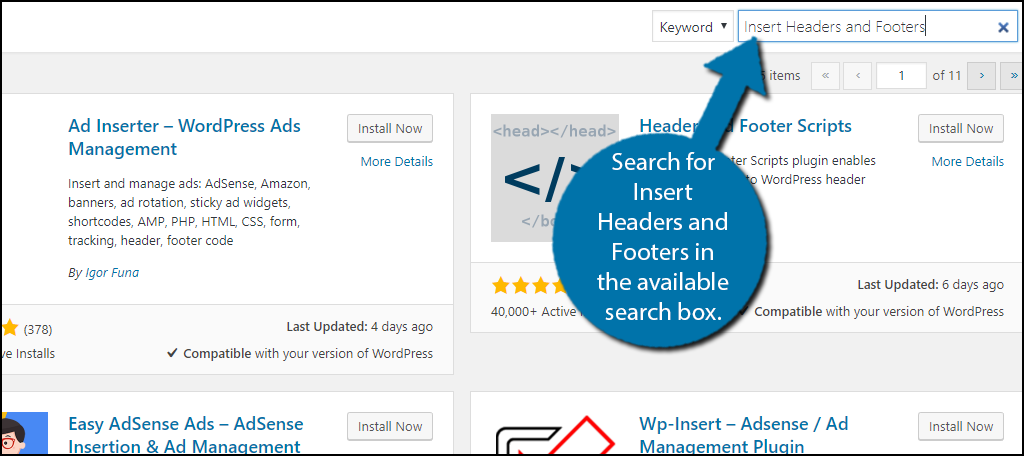
Search for Insert Headers and Footers in the available search box. This will pull up additional plugins that you may find helpful.
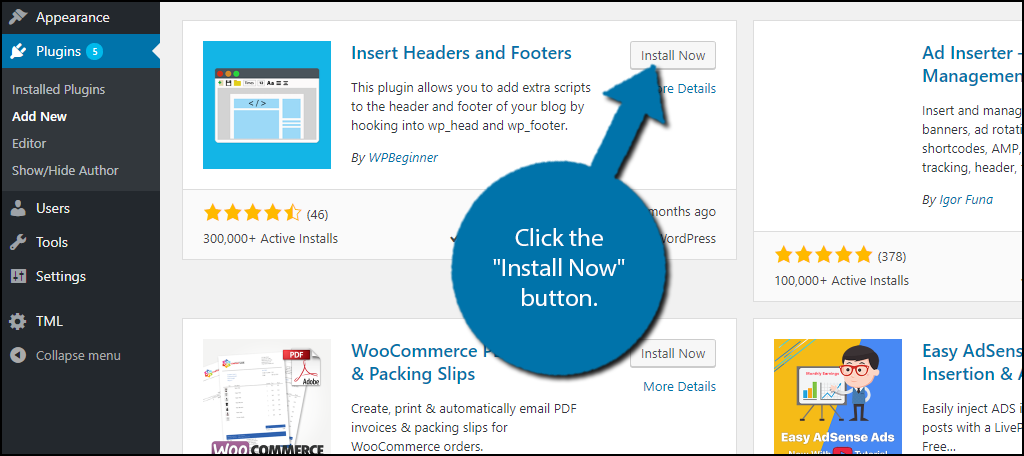
Scroll down until you find the Insert Headers and Footers plugin and click the “Install Now” button and activate the plugin for use.
Step 5: Insert the Pinterest Code into Header
On the left-hand admin panel click on Settings and select the Insert Headings and Footers option. This will pull up the main settings page.
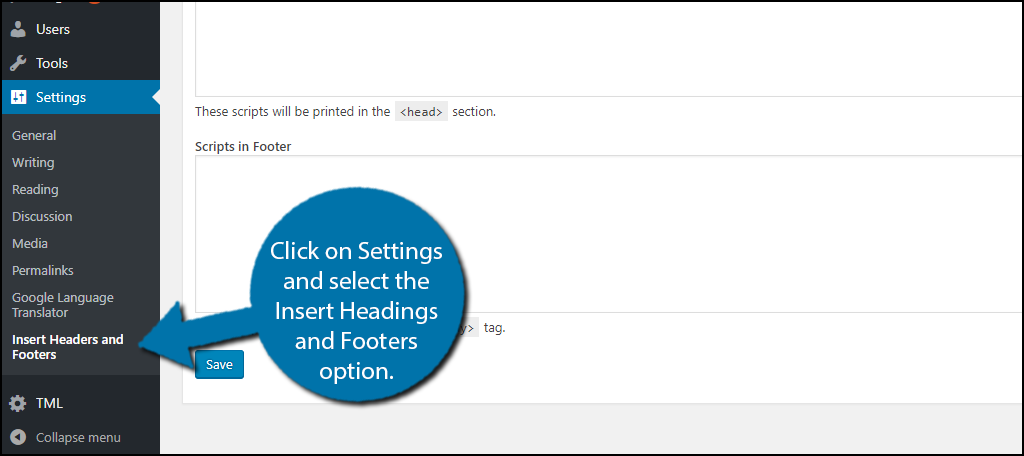
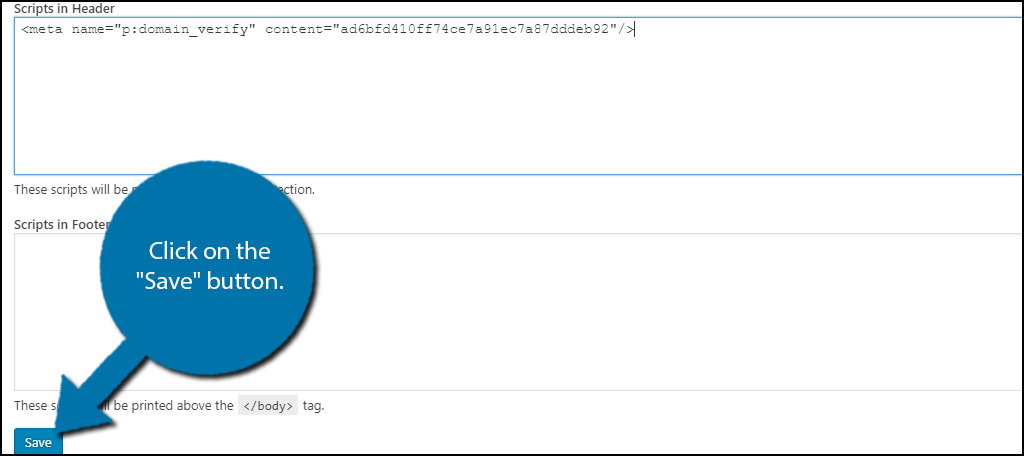
The plugin has two text boxes. The first will add anything placed into it as a header and the second will add anything as a footer to your website. Paste the meta name tag into the header box. Click on the “Save” button.
Note: If you remove this plugin the meta name stage will also be removed. Thus you cannot simply install the plugin and then get rid of it.
Step 6: Visit Pinterest Analytics
The process of being confirmed by Pinterest may take up to more than one hour. Once your website is confirmed, visit the Pinterest Analytics page by clicking on the 3 dots and selecting Analytics.
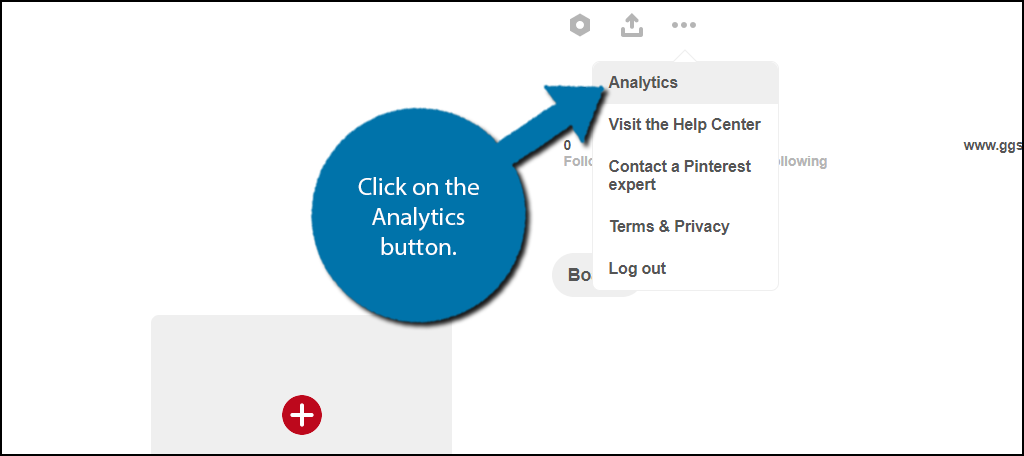
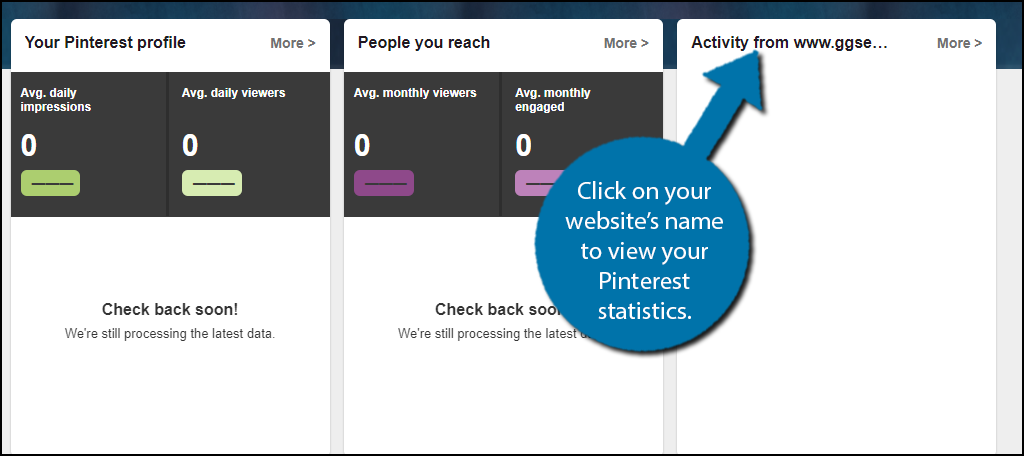
Analytics will show your activity on Pinterest and your website separately. If you have not been verified yet, then you won’t see any data on your website. Click on your domain name to view your Pinterest statistics from your website.
Note: If you have multiple websites, you will have to use the more option on the right.
Congratulations, you have successfully verified your website on Pinterest and can now view Pinterest analytics.
This is a really handy tool to use and will show you which pins are performing the best from your website. Use the best-performing pins to find out what works best for your audience. Low-performing pins should be re-evaluated.
So What Can Pinterest Analytics Track?
With the setup out of the way, it’s time to start analyzing. Pinterest Analytics gives you a variety of statistics to see just how well your Pinterest content is performing on and off your website.
First, you can see if your content is getting pinned. This includes which pieces are getting pinned, the number of unique visitors doing the pinning, and how many users saw those pins and visited your website as a result.
While on the Pinterest side of things, you can see which are receiving the most repins, the number of unique visitors that are repinning, and the number of visitors that saw those pins on specific dates.
There are also a variety of other interesting metrics like the ability to see how many times one of your pins appears in a search result.
By utilizing this information, you can work on improving your understanding of what content works and what doesn’t on your website.
Understand the Data You’re Looking At
One tip I really need to mention is to make sure you understand what your looking at. Pinterest Analytics does a good job at providing this information. However, even I have to admit that the charts and graphs they display can blend together.
For instance, they might have two graphs that are nearly identical, but the difference could be if the data is from unique or total visitors. What does this mean? Say someone repins your content, is that a unique visitor or are they doing it again?
This can heavily skew the results you view, which is why Pinterest makes that distinction.
Understand Your Community
Understanding why a website is growing or not growing is not an easy task. It is very nice to see your website developing, but if you are not sure why it’s not, then it may be hard to continue your growth.
Using tools like Pinterest analytics and similar platforms for other social media sites is the key to finding out what content your community likes the best. Improving the content for your visitors and followers is the key to growth.
Finding out which content is not so popular is extremely important as well. You need to make sure you understand why your content is not working and either improve or discontinue it. Producing unpopular content is a waste of time for everyone involved.
Don’t get discouraged, because there is not a single website or company that produces perfect content every time.
Does This Replace Google Analytics?
No.
Pinterest Analytics is a great tool for managing most of your Pinterest data, but it does not provide any information about your actual website. Whereas, Google Analytics does, and it even provides more information about Pinterest.
For instance, you can’t see how much revenue and number of orders placed as a direct result of Pinterest. This information is only available in Google Analytics, thus, I highly encourage you to use both of these analytical tools to get the information you need.
In fact, as a general rule of thumb, the more analytical tools you use the better. They can provide unique metrics that can help you succeed.
Final Thoughts
Analytics can give you all sorts of insights into data that can be used to help your site perform better. Since Pinterest is becoming such a big player in the world of social media, it is a good idea to take advantage of the tools they offer like Pinterest Analytics.
I hope this article was able to show you how easy it is to add Pinterest Analytics to your WordPress site.
What kind of content has viewing the Pinterest analytics page uncovered for you? Have you considered trying other social media platforms like Facebook?