While most developers focus on designing their website for visitors, the WordPress dashboard is only for the developer’s eyes. As a result, you can customize the WordPress dashboard to help you locate important information with a few simple tweaks.
None of the changes to the dashboard will be visible to visitors and it will not affect any other part of your website. Thus, making these changes will not impact anything but the developer’s view. There are a variety of plugins that add additional dashboard widgets upon installation.
You might already have some that you aren’t using.
Today, I will demonstrate how to customize the WordPress dashboard in a variety of ways.
What is the WordPress Dashboard?
The WordPress Dashboard is the admin control panel of your website. It allows you to view information after logging in and can be accessed at any time afterward. Developers can use it to view statistics and provide immediate access to tools that help you maintain your site.
For instance, if you utilize the Broken Link Checker plugin, you can add an alert option to the dashboard to display any broken links on your website. This allows you to quickly respond to problems before catching on too late.
Another interesting application of the dashboard can be to monitor what other employees are doing. It’s quite common for larger websites to have multiple authors or have contributors that regularly add content. You can check how active they are from the dashboard.
You can even add a calendar full of upcoming events or even a to-do list. A custom dashboard can really go a long way in managing your website; thus, let’s learn how to customize it without further ado.
Make Your Dashboard Look Professional With Custom Branding
By default, WordPress uses its own logo on your dashboard. And that’s fine for most websites because no one can see without being in the backend. However, adding your own can help make your website seem more professional to staff.
This is especially important if you have a lot of people accessing the backend of your website, like guest bloggers. Settings a professional image for staff can help open up opportunities or give off that illustrious professional vibe.
Another thing to consider is if you develop websites for clients. Having your logo is a way to brand your business for those clients who are going to use the website for years to come.
That said, most won’t think twice about a backend that has been left in the default state. So don’t feel like you have to customize the WordPress dashboard.
How to Easily Customize the WordPress Dashboard
Step 1: Choose Your Dashboard Widgets
This tutorial will showcase how to customize the WordPress dashboard using built-in options. Plugins can add new options for the dashboard, and they can be added via the screen options. This is also how you can choose which default options will appear.
Note: The Screen Options are available in every area of WordPress, but the options they provide are specific to the section you are in. This means you can only find dashboard options when you are in the dashboard.
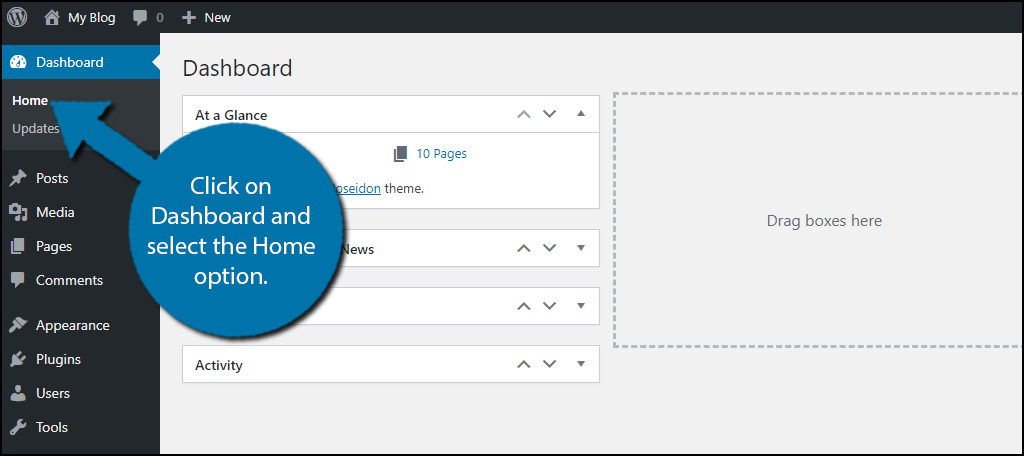
Click on Dashboard and select the Home option.
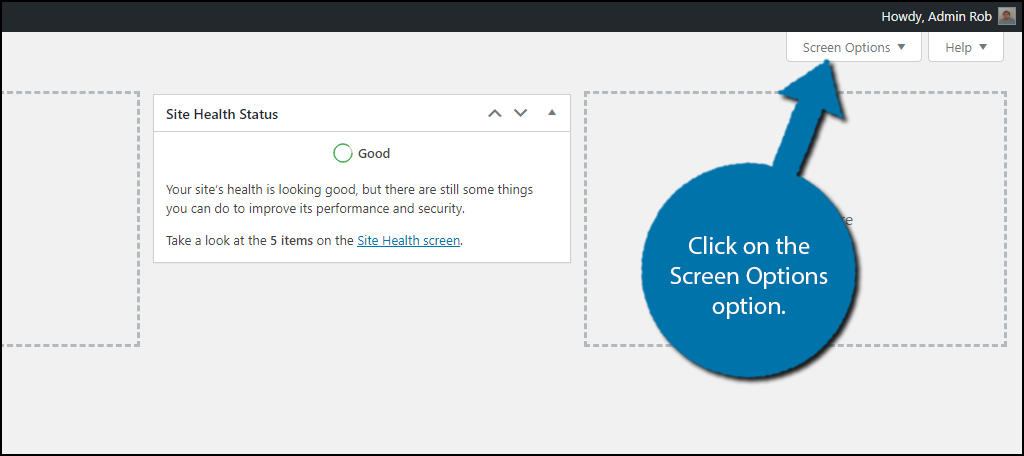
This is the WordPress dashboard and by default, it contains quite a few pieces of information. Some you may find useful and others not so much. Click on the Screen Options option.
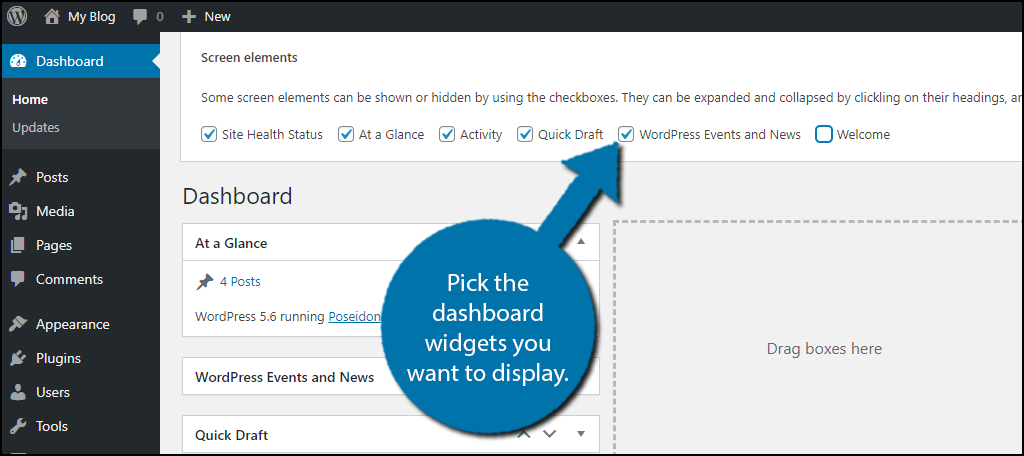
By default, you will have six dashboard widgets to choose from that include Site Health Status, At a Glance, Activity, Quick Draft, WordPress Events and News, and Welcome. Each of these options has a small checkbox you can use to enable them.
Note: You may have additional options available as a result of plugins. Many plugins have dashboard options that you may not be aware of.
Pick the dashboard widgets you want to display.
All of the dashboard widgets are added to the dashboard. To create a custom dashboard for WordPress, we are going to need to organize them. Just remember that similar to plugins, the more dashboard widgets you have the slower your back-end will get.
Step 2: Organize Your Dashboard Widgets
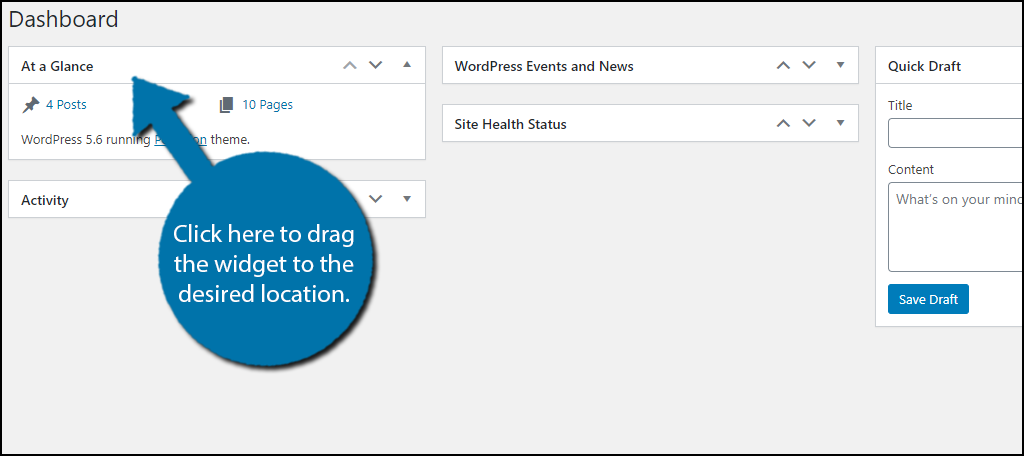
WordPress was built to be used by anyone, and one of the simplest ways to move anything is to drag and drop items. The WordPress dashboard is no exception. Everything in this section can be rearranged by dragging it.
To drag a dashboard widget, click on its title and drag it to the desired location.
Note: Your cursor will become a four-way mouse icon when hovering over the draggable part of the widget.
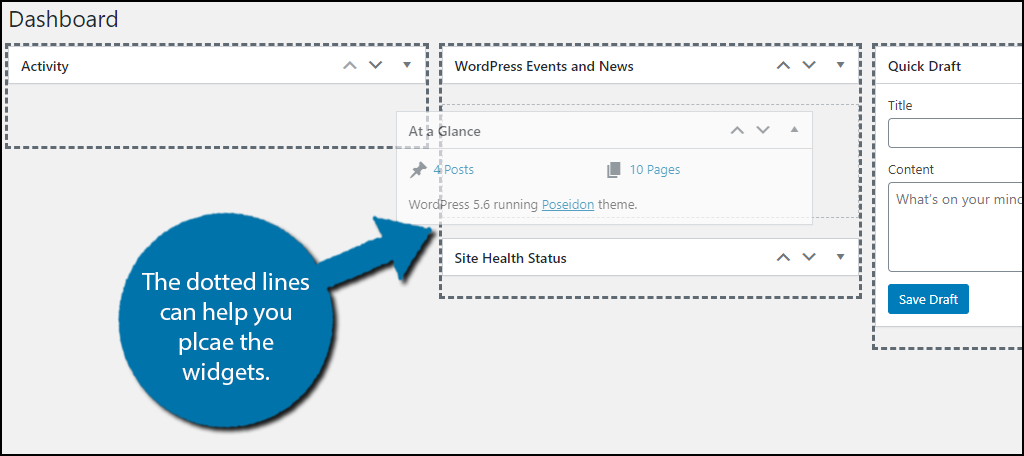
When moving the widget, the potential spots are outlined with dotted lines. If you hold onto the widget, you can see what it will look like before you place it. Although you don’t have to worry too much about making a mistake, you can easily rearrange them if it happens.
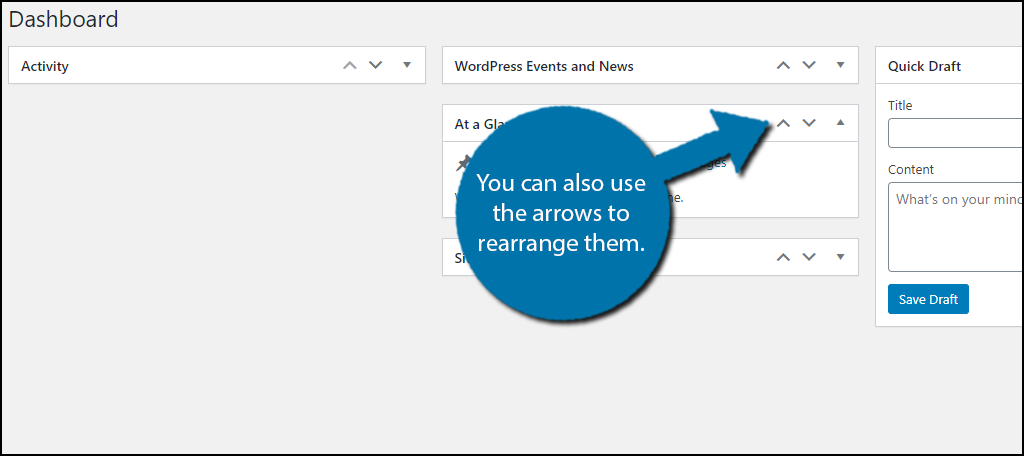
There is also a second option to rearrange these dashboard widgets, by using the arrows. This can also be useful if you have trouble with drag and drop movements. You can simply click on the up arrow to move it above a widget or the down arrow to move it below another.
Now that you have the widgets you want to use and they are in the position you want them, all that’s left is to add more.
Note: Some plugins have ways to customize the widgets. Unfortunately, none of the built-in ones allows you to change appearances. But all widgets that allow you to customize them are unique to that specific widget.
Additional Plugins to Consider
When you install a plugin that is capable of displaying information on the Dashboard, it should appear in the list of items in the Screen Options tab. Some plugins may have Dashboard controls you weren’t even aware of.
Check the Screen Options after installing a plugin. You may benefit from having it on your WordPress Dashboard. However, there are some WordPress admin plugins dedicated to adding custom dashboard widgets to your site.
Here are a few WordPress dashboard plugins you may find useful:
Google Analytics Dashboard for WP
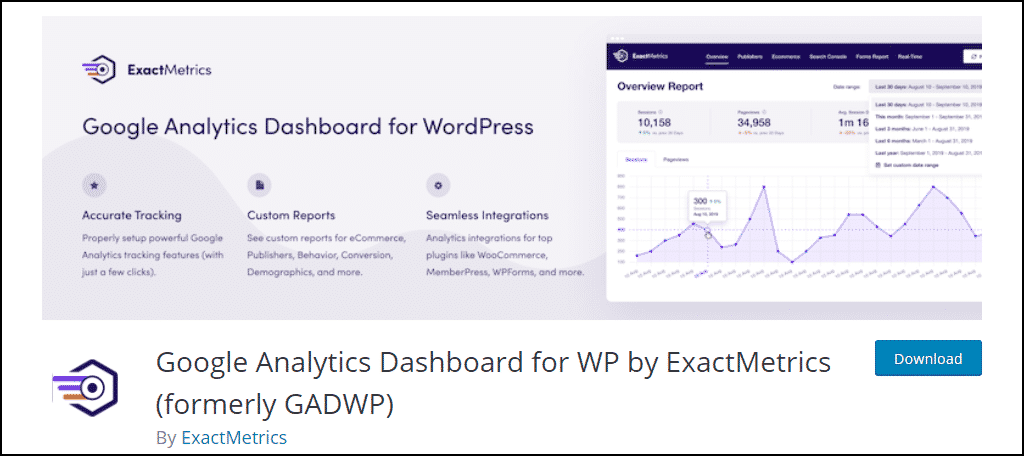
If you are like most blog owners, you are constantly checking your website’s analytics via Google Analytics. What if I told you that you could do that from your WordPress dashboard? Well, you can with the very popular Google Analytics Dashboard for WP plugin.
It allows you to take key analytical tools and put them right on your dashboard. However, you will still want to check Google Analytics for the full analysis.
Ultimate Dashboard
What if you want to make your own custom dashboard widgets? This would require a bit of work to do without a plugin, but you don’t have to worry about that. The Ultimate Dashboard plugin allows you to create your own simple dashboard widgets.
By adding a URL to a specific area of your website or another one entirely, you can make useful tools to save time. It will also create better visuals for the dashboard widgets you create.
Broken Link Checker
You may very well already have this awesome plugin installed, but did you know it also adds a Broken Link Checker dashboard widget? Well, it does. Instead of having to visit the settings of the plugin, you can have a display right when you log in.
This helps you immediately see when there is a broken link on your website. To do this, you would simply need to use the Screen Options that we previously discussed.
Try Out An Admin Theme
I’m sure you’re well aware of what themes are and what they do, but have you ever heard of an admin theme? This is an appearance change for the admin panel on the backend of your website.
It’s a great way to customize the WordPress dashboard.
This will not change the location, or name (in most cases), of any item that appears on this menu. It’s the equivalent of adding a new coat of paint to the admin panel. To add an admin theme, you simply need to install the correlating plugin.
Here are some admin themes that you may like.
Aquila Admin Theme

Without a doubt, the Aquila Admin Theme is the best you can get within WordPress. It allows you to customize every element within WordPress, including replacing the WordPress logo with your own company image.
With this plugin, you can change the color of the admin panel, the color of the text, the notification color, and various other settings. The only change it will make to the items on the admin panel is that it will change the Posts section to the Blog section.
This can be reverted in the plugin settings. And yes, the plugin is free to use.
WordPress Backend Customizer
The WordPress Backend Customizer plugin is another terrific way to edit your admin menu for free. It allows you to change all of the colors and even includes a handful of templates to choose from to help give a more customized look to WordPress.
It does do a little more than just the admin panel, as it also handles the login screen. You can customize the login screen to match your website’s design, which is a good choice, especially if you have a lot of guest bloggers.
It just looks more professional.
Customize the Admin Menu
You might also be interested in changing the order and names of the items on the admin menu. This is something you cannot do by default, but like most things in WordPress, you can get around this with a plugin.
In this case, the Admin Menu Editor plugin is perfect for the job.
It allows you to hide elements, change permissions (based on user roles), customize the icons, and so much more. If you’re serious about customizing the admin panel, this is definitely what you want to do, but I do not recommend doing this as a beginner.
And just to be clear, it’s not due to difficulty.
It’s because changing the names of elements, or changing their location, can make it difficult to follow tutorials. While this might sound simple, it can cause you a lot of headaches if you are still learning the platform.
However, it is something worth pursuing once you are comfortable with it.
Will This Impact the Front-End of My Website?
Absolutely not.
Changes to the dashboard and admin panel will only impact the backend of your website, or more specifically, the time it takes to load the dashboard. That said, some of the changes you make could have the opposite effect and actually speed up your backend load times.
Now, while this will not affect visitors, it can be really annoying to staff members or guest bloggers. This is why it is still a good policy to ensure that your backend is not running sluggishly.
Do These Changes Work On Any WordPress Theme?
Any modern WordPress theme should support all of the changes discussed in this tutorial.
In fact, some might even have their own customization options, but they are most likely a premium theme. This is because the standard WordPress theme only affects the frontend of your website, thus changes to the backend don’t impact it.
Do I Actually Need A Plugin To Do Any Of This?
No.
In reality, you can just code all of these changes into your theme’s functions file. That said, many beginners will find this to be a bit challenging, but if you have the coding experience, it’s not that hard to do.
A WordPress Custom Dashboard Saves Time
The ultimate goal of a WordPress dashboard is to save the developer time and allow him or her to view important information when logging in. After all, the dashboard is the first thing you can see when after the login screen.
And this is by design.
Making changes to the dashboard will not impact the visitor experience in any way from a visual standpoint. However, it is worth pointing out that all plugins, big or small, will have some impact on your website’s performance.
Thus, adding a bunch of plugins for the sole purpose of customizing your dashboard may not be advisable. But, one or two shouldn’t make a vast difference.
What dashboard widget do you find to be the most helpful? Did you install any plugins just for their dashboard widget?