There may come a time when you have built a WordPress website that you don’t want anyone to see without having to log in first. There may be several reasons behind this. If so, it is ideal to figure out a way to force login on a WordPress website.
Why Force Login in WordPress?
There may be several reasons behind you wanting to push forward with a WordPress force login layout. Maybe you have a blog that has content you only want registered users to see.
Or, you may just want to hide your website from everyone except specific people. In this case, when you force a login in WordPress, you are basically saying that users can only see your site content if they are actually logged into the website.
Perhaps you want to build a members-only platform for your local group or business.
Remember, there are several WordPress User Roles available. Just because you force login for a user does not mean that they have admin access or editor access to your website. It simply means that you are forcing them to log into your site as a member or user in order to view the content in question.
In order to force a login within WordPress, you either have to know some code, or find a plugin that will automatically do this for you. Fortunately, I have found an outstanding plugin that will accomplish this.
Not only that, but I will also show you some different PHP code to use for certain situations. So, below we will look at the plugin itself, as well as some code strings to use in order to force the login in certain situations on a WordPress website.
Let’s take a look at the plugin in question. After that, I will go over installation and usage with you.
Force Login
The Force Login plugin is simple, straightforward, and very easy to use. The plugin name reflects exactly what it does when installed and activated. Basically, it hides your WordPress website from public viewing by requiring visitors to log in first.
While plugin usage and setup is as easy as flipping a switch, it still comes with a number of great features that you can use to your advantage. Some of the main features include:
- Compatible With WordPress MultiSite
- Login Will Redirect Visitors Back to URL They Tried to Visit
- Developer API (Extensive Hooks and Filters)
- Highly Customizable (Set Specific URL)
- Page and Post Filter Exceptions
- Ability to Restrict REST API to Authenticated Users
- WPML Certified and Translation Ready
Basically, you can force login and block content in a number of ways. Let’s take a look at how to get the plugin installed and activated.
Install and Activate the Plugin
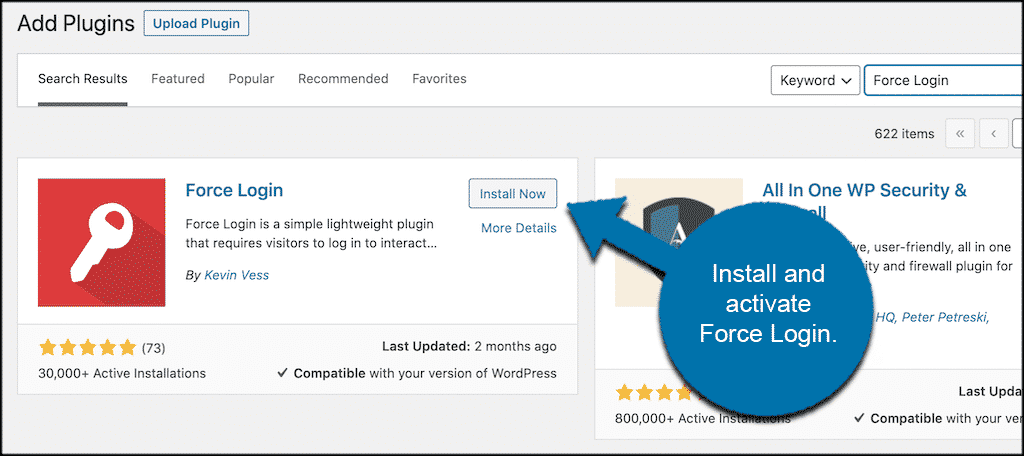
In order to force login in WordPress, you first need to install and activate the plugin. You can do this by heading over to the Plugins page inside your WordPress admin dashboard. Simply search the plugin name and install it from there.
Once the plugin has been installed and activated, you are actually good to go. There are no settings and no other setup. Force login is automatically turned on and working.
As mentioned above, it is basically like flipping a switch.
However, there are some code strings we can look at and force login in different situations. Let’s take a look at those in order to give you a better idea of what else you can do with this plugin.
Force Login Options
As I said above, anytime someone tries to go to your website now, or any URL on your site, they are automatically redirected to the WordPress login page for your website. Here, they can log in with their credentials to access the content.
Remember, when a user signs in, they will automatically be redirected to the URL they were trying to view. Or, if they were on the home page, the redirection will take them back.
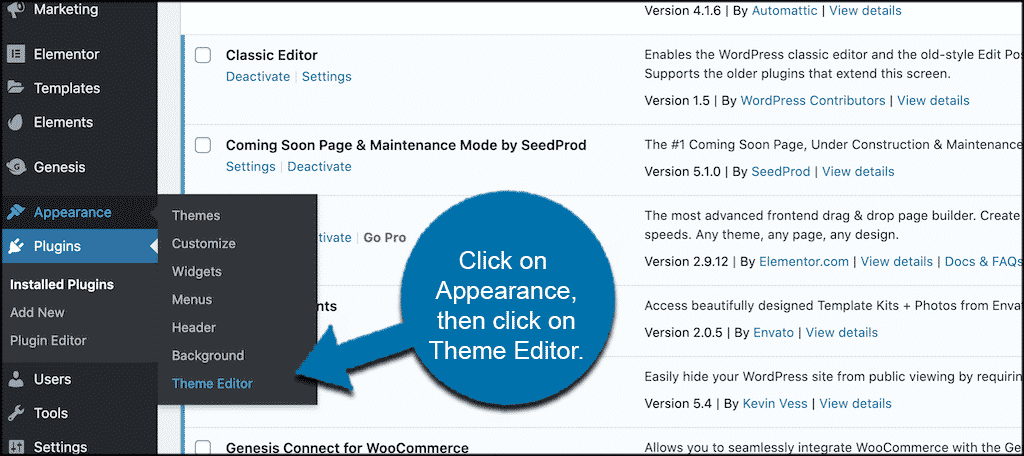
However, what if you want to perform some other force login options based on certain situations? That can definitely be done. You simply have to access the functions.php file and add some of the code listed below for the relevant situation.
You can access the functions.php file by clicking on Appearance > Theme Editor.
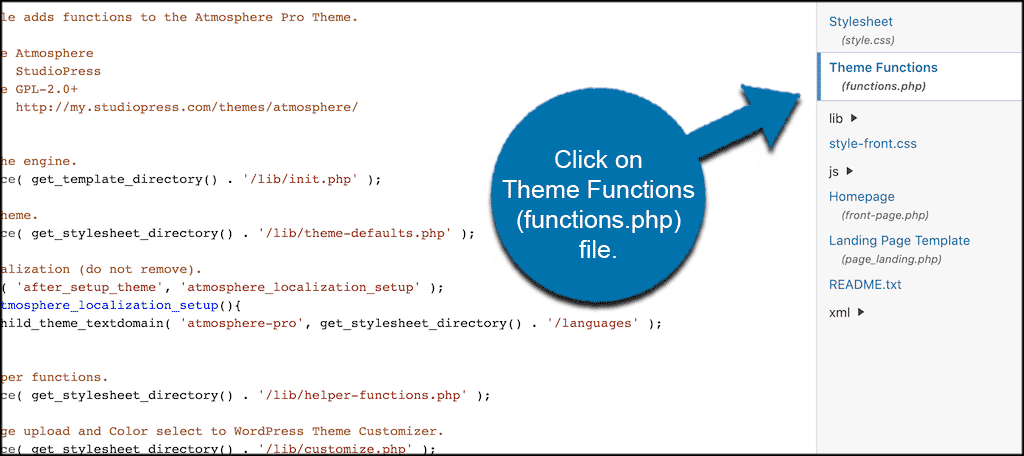
This takes you to the Theme Files page where you will see all your theme files. Click on the Theme Functions (functions.php) file take and add any of the code below to the end of the file and save it.
Specify a URL to Redirect To Upon Login
If you want a user redirected to a specific URL no matter what, then use this code:
/**
* Set the URL to redirect to on login.
*
* @param string $url The visited URL.
* @return string The URL to redirect to on login. Must be absolute.
*/
function my_forcelogin_redirect( $url ) {
return home_url( '/mypage/' );
}
add_filter( 'v_forcelogin_redirect', 'my_forcelogin_redirect' );
Add Exceptions for Certain Pages and Posts
You are able to bypass force login based on any conditions. You can also use WordPress conditional tags. Below is the code to bypass, and the code to whitelist URLs.
Bypass Force Login
* Bypass Force Login to allow for exceptions.
*
* @param bool $bypass Whether to disable Force Login. Default false.
* @return bool
*/
function my_forcelogin_bypass( $bypass ) {
if ( is_single() ) {
$bypass = true;
}
return $bypass;
}
add_filter( 'v_forcelogin_bypass', 'my_forcelogin_bypass' );
Whitelist URLs
/**
* Filter Force Login to allow exceptions for specific URLs.
*
* @param array $whitelist An array of URLs. Must be absolute.
* @return array
*/
function my_forcelogin_whitelist( $whitelist ) {
$whitelist[] = home_url( '/mypage/' );
$whitelist[] = home_url( '/2015/03/post-title/' );
return $whitelist;
}
add_filter( 'v_forcelogin_whitelist', 'my_forcelogin_whitelist' );
Get the WordPress Mobile App Working
By default, the Force Login plugin blocks access to all page URLs when it is activated. However, you might need to whitelist the XML-RPC page. this will allow the WordPress app to access your site for remote publishing.
/**
* Filter Force Login to allow exceptions for specific URLs.
*
* @param array $whitelist An array of URLs. Must be absolute.
* @return array
*/
function my_forcelogin_whitelist( $whitelist ) {
$whitelist[] = site_url( '/xmlrpc.php' );
return $whitelist;
}
add_filter( 'v_forcelogin_whitelist', 'my_forcelogin_whitelist' );
Hide “Back to Sitename” Link
The WordPress login page always includes a “back to sitename” link on the page. if you would like to hide that link, then add the following code:
// Hide the 'Back to {sitename}' link on the login screen.
function my_forcelogin_hide_backtoblog() {
echo '';
}
add_action( 'login_enqueue_scripts', 'my_forcelogin_hide_backtoblog' );
Final Thoughts
Forcing a user to log in to view your WordPress website is as easy as installing and activating the plugin above. Once it is running, your site visitors will automatically be forced to log in before they can view any pages on your website.
You also have several code options available that give you the ability to force login in certain situations, whitelist URLs, and even attach the WordPress mobile app.
I hope this tutorial gave you clear and easy instructions for forcing users to log in to access your WordPress website pages.
Do you have a website that you force users to log in before they can view? Have you used the plugin above in the past?
thank you that helped us a lot
You’re welcome.
The redirects on this post all don’t work, they error and won’t save.
Hello Sarah, I had to remove old coding from a plugin we don’t use today. Try the snippet now and see if that helps.
Thank you for sharing.
I was wondering how can I modify your Whitelist URLs snippet to accept https://example.com/members/username/profile/
I tried with very little success. Seems that it could only accept one URL at the time without wildcards.
Thanks in advance
FYI I am trying to make my BuddyPress profile page public, while the rest as private. Thanks.
I would try adding the URL to the whitelist using the first “/” immediately after “.com,” or whatever domain extension you’re using. In your example URL, that would be “/members/username/profile/”
I’m not sure if perhaps BuddyPress is squicking the ability outright. You might have to ask them on the WordPress.org forums. Most developers are pretty quick to respond in cases like this.