Did you know it is easy to show today’s date in WordPress? It makes it looks like the site is relevant to the present. Even if the last piece of content was created in 2009, the current date gives the site a “here-and-now” appeal.
However, keep in mind that if you choose to do this, that the content is up-to-date. After all, visitors will quickly tell something is off if you’re talking about something from a decade ago. The content you use this content on be age proof.
Today, I’m going to delve into how you can add the date to a WordPress website. It’s a small addition that may improve how visitors view the content.
3 Ways to Show Today’s Date in WordPress
There are actually a few different ways you can display today’s date in WordPress. I’ll go over three of the easiest methods that can quickly put the current day on your website for visitors.
Method 1: Using a Specific Theme
Many themes that are available on WordPress have the ability to show today’s date without adding extra coding. For example, the ColorMag theme has an option you can easily turn on and off at your leisure.
Unfortunately, your current theme might not have this feature.
Let’s find out if your theme supports showing the date. Click on Appearance and select the Customize option.
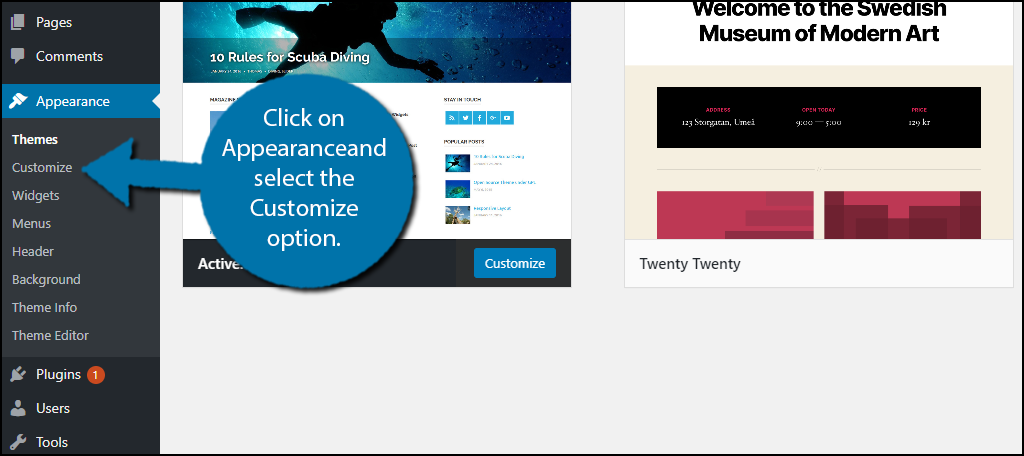
When the WordPress customizer appears, you’ll see a variety of options on the left side. The customizer allows users to change the look of a theme in most cases.
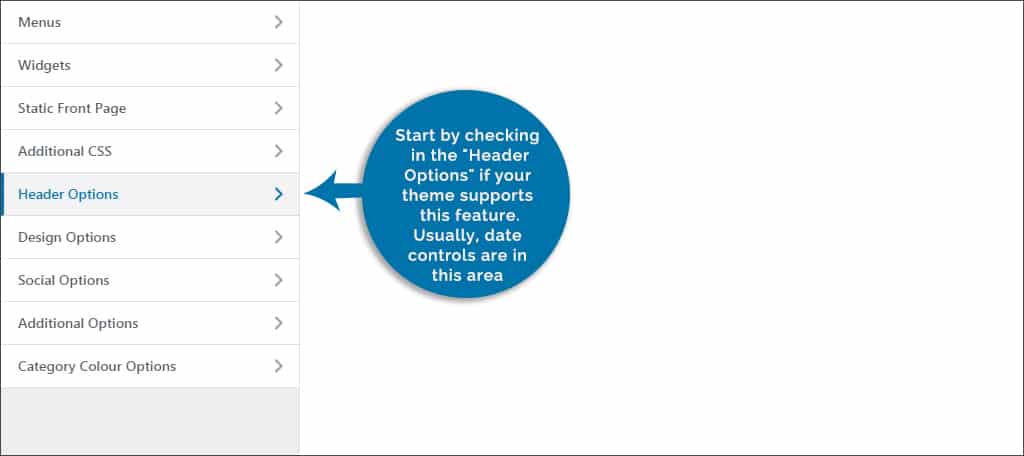
These are the controls for your theme. Some will have more options available than others. It will be in this section where you will look for an option that reads, “Show Date.”
Of course, this may be different depending on the theme you are using.
Start by checking in the “Header Options” if your theme supports this feature. Usually, date controls are in this area.
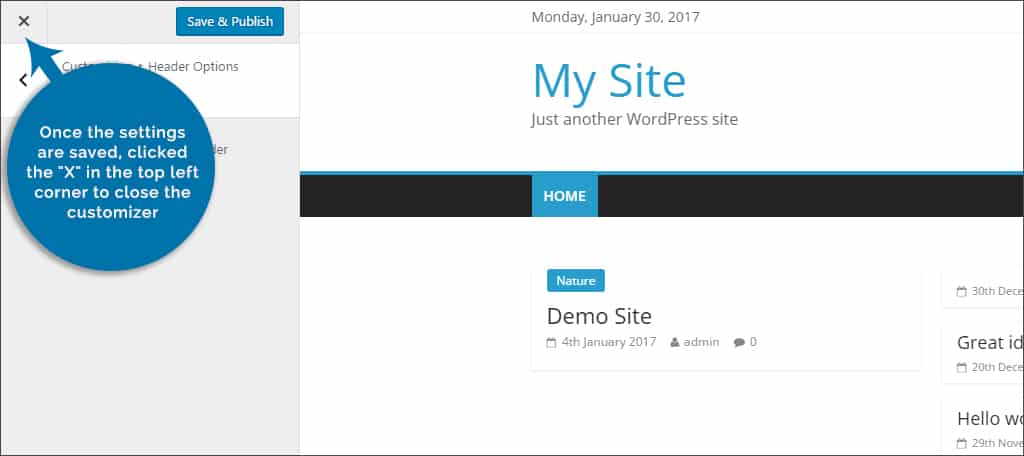
If you’re able to add the date to your theme’s appearance from the customizer, click the “Save & Publish” button near the top left of the screen.
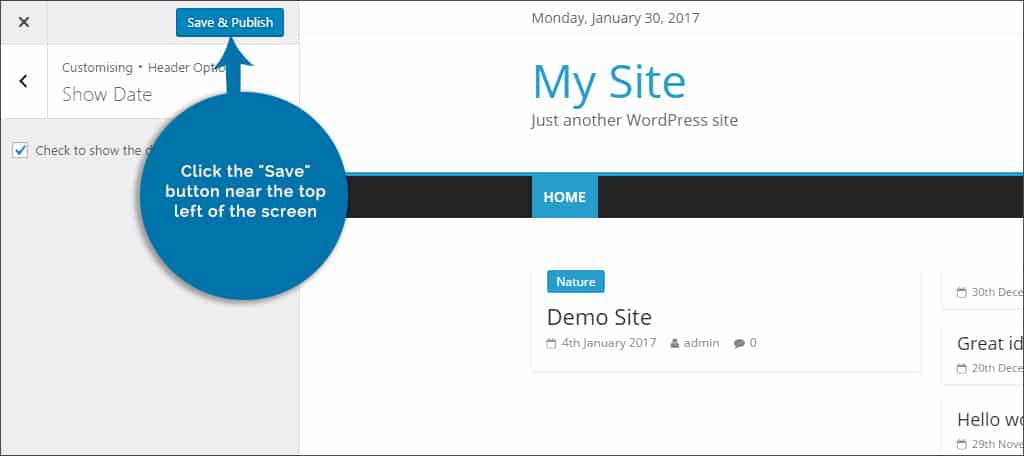
Once the settings are saved, click the “X” in the top left corner to close the customizer. This will take you back to the WordPress admin dashboard.
Because every developer is different, not all themes will have the same abilities when making adjustments. However, you may find that your theme supports far more capabilities than you thought if you take a look in the customizer.
Some will even include social sharing buttons and other small tools.
Method 2: The Plugin Approach
You would think that adding a current day would be an easy plugin to find. Unfortunately, there are not many that exclusively focus on this. This is most likely because you can add it with code or websites don’t want to exclusively show today’s date.
After all, there are many advantages to not displaying the current date on your posts.
For this tutorial, I’m using the WP Date and Time Shortcode plugin. This plugin allows you to show past, future, and the present date on any of your WordPress posts. As the name implies, this is all done by using a shortcode.
Thus, the plugin should only take a few minutes to cover.
Step 1: Install WP Date and Time Shortcode
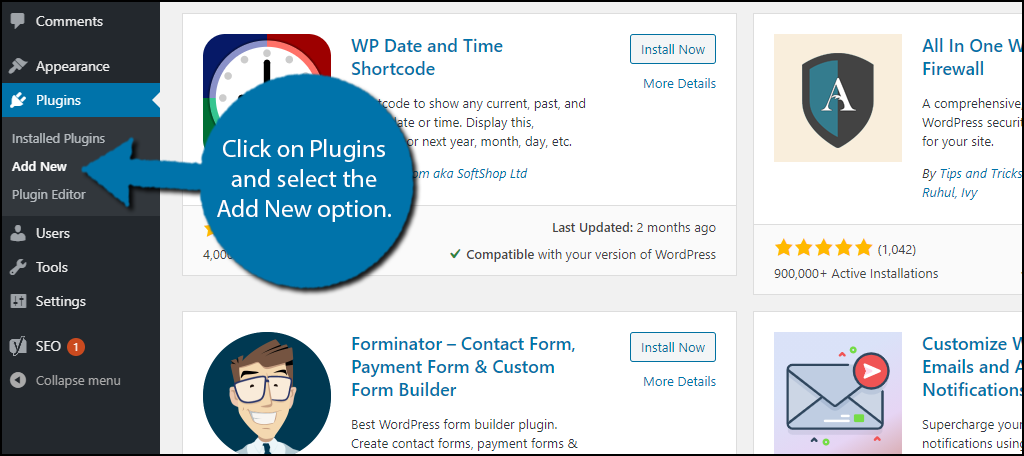
Let’s start by clicking on Plugins and selecting the Add New option on the left-hand admin panel.
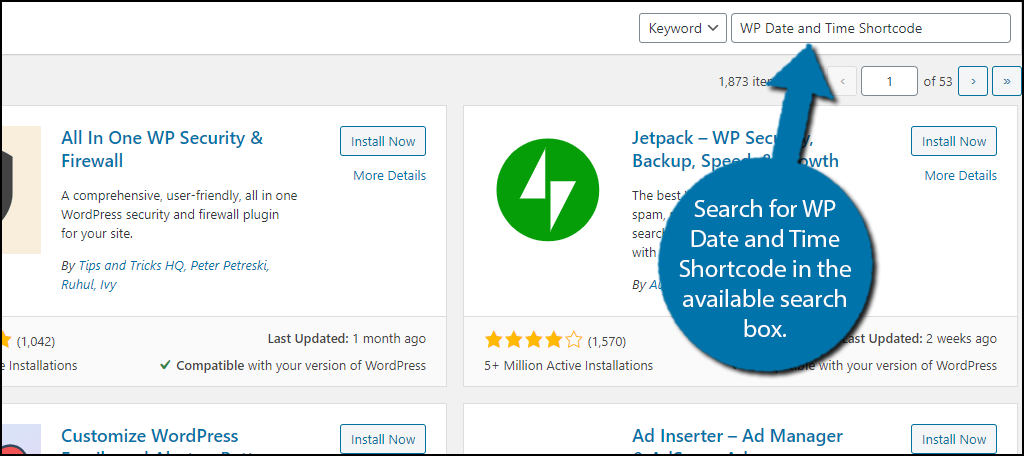
Search for WP Date and Time Shortcode in the available search box. This will pull up additional plugins that you may find helpful.
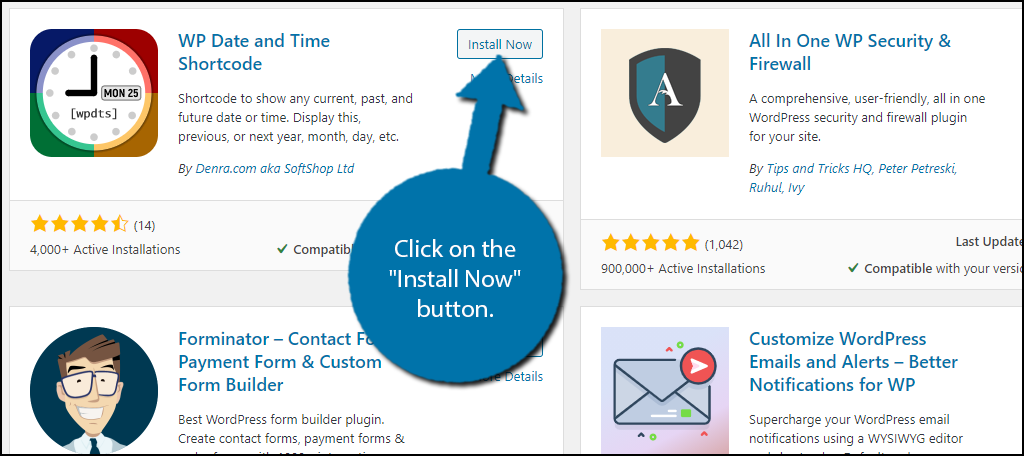
Scroll down until you find the WP Date and Time Shortcode plugin and click on the “Install Now” button and activate the plugin for use.
Step 2: Remove the Date and Time
You are actually ready to add the shortcode, but there are two major setbacks of using this plugin.
- It doesn’t remove the WordPress date and time that show in posts
- You have to manually enter the shortcode on every post
While there is no way around manually entering the shortcodes, it is pretty simple to get rid of the date and time in WordPress. In fact, I would probably recommend doing that over displaying the current date on every post.
To do this, you will need to customize your theme. Every modern WordPress theme should have this feature, but it can be in a different location.
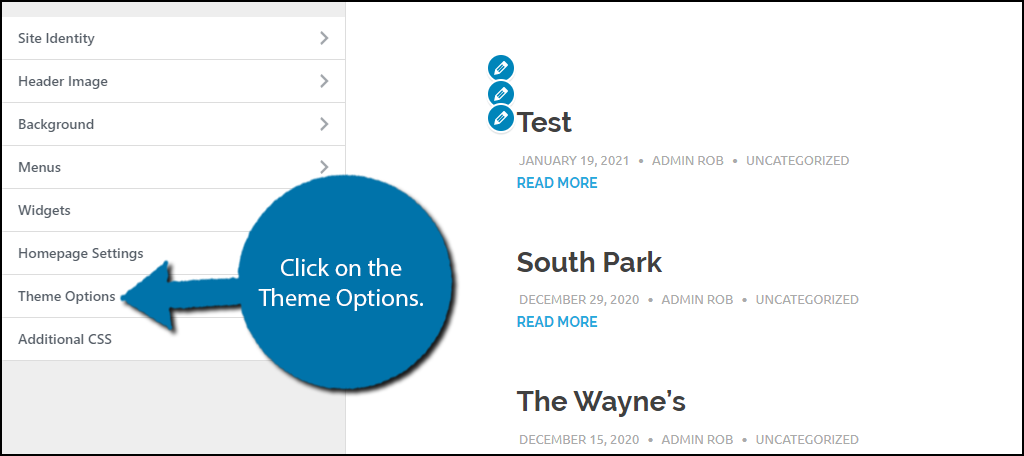
Enter your theme’s customize section and click on the Theme Options.
Note: This setting may be in a different option. If you do not see a similarly named option, just go through the section one part at a time.
In my case, I then click on the Post Settings option. Inside, there are a series of options and one of them is to display the date. Simply uncheck the box.
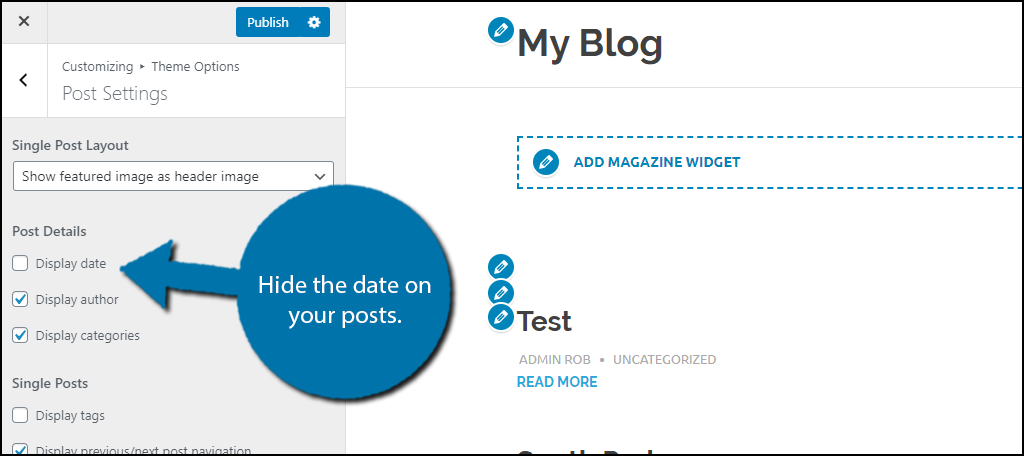
This will remove all dates from your website, otherwise, you risk showing the date multiple times once you begin adding shortcodes.
Step 3: Add the Shortcode
While this plugin does add a new option to your admin panel, it serves no purpose other than sharing contact information, collect donations, and link you to the plugin page.
Everything you need for this tool is located on the plugin page.
There are a variety of shortcode options in WordPress that I recommend taking a look at, but for this tutorial, we are only interested in the one to show the current date.
It is as follows:
[wpdts-date-time]
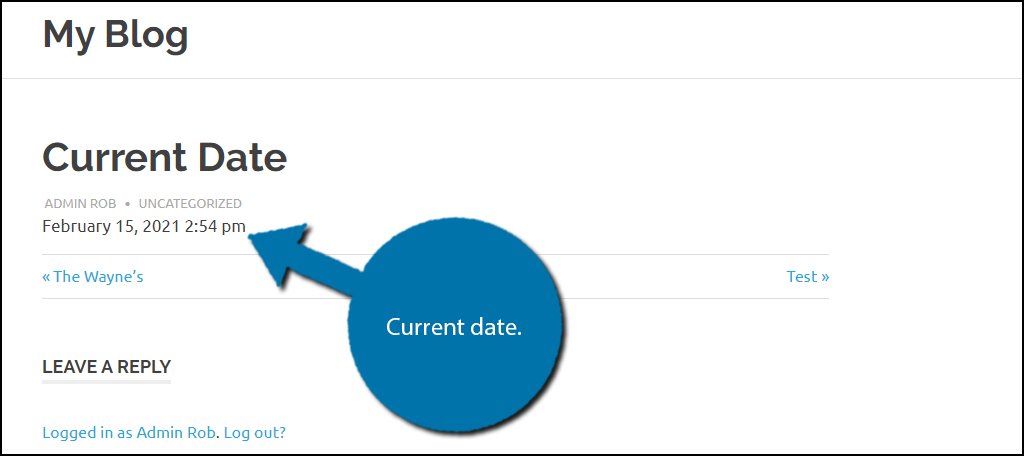
This shortcode will show the current date and time based on your WordPress settings. Thus, if you do not like the format it is using, you must change the WordPress presets.
The shortcode will appear as part of the post. So make sure to place this shortcode in the same location for every post.
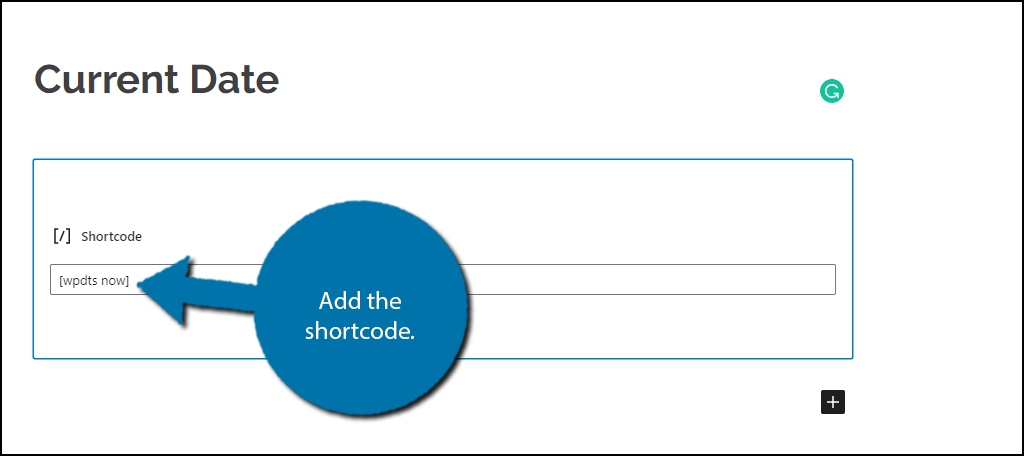
Save the changes and you can now view your current date.
Method 3: Adding the Date Using Code
This next method to show the date in WordPress is a bit more tricky for those who don’t know how to add code to a website. And because this method depends heavily on the theme you are using, I can only provide general information.
First, let’s take a look at the code:
This code will always display the current date and time according to your WordPress time format. Thus, if you do not like the format being displayed, you only need to change the format settings and not the code.
However, the problem here isn’t the code, but its placement.
Each theme is coded differently, thus the file you need to add this code to is different as well.
It may take a bit of trial and error to find the perfect location for this snippet.
Visitors Avoid Old content
Adding today’s date can be a simple process, depending on how much work you want to put into it. However, it’s probably a good idea if you want people to trust the reliability of your content After all, visitors always try to click on the newest content.
Just by simply adding a time-stamp to the website, many people will view its relevance differently. However, it’s worth pointing out that solely displaying the current date can be problematic. For instance, it would be strange to put today’s date on a news story from two years ago.
Thus, you need to make sure any content that has today’s date on it is relevant.
What kind of simple add-ons do you use to keep your visitors interested? How often have you come across a plugin that saved you from having to add code manually?
nice information
Thanks
Please note that the shortcodes from WP Date and Time Shortcode work like this:
[wpdts] and [wpdts-date-time] show date and time as they are defined in the settings of WP
[wpdts-date] – date only
[wpdts-time] – time only
[wpdts-custom format=”D, M j, g:i a”] – custom format based on the PHP date and time format.
etc.
The ‘now’ text in the shortcode is not needed. It is used only in the start attribute by default. [wpdts start=”now”] which can also be any relevant date fpr,at e.g. [wpdts start=”tomorrow 10:00 am”], [wpdts start=”first day of next month 14:00″], [wpdts-date start=”next Tuesday”], etc.
All attributes for the plugin can be seen at the plugins page on wordpress.org:
https://wordpress.org/plugins/wp-date-and-time-shortcode/
Hello,
Good information, which is why we suggest taking a look at the different shortcodes on the plugin’s page. There’s a lot you can do with the plugin method.