FTP user accounts have access to your website’s files and can upload, download, delete and change permissions on most files in the directories they have access to.
You can also create FTP users that have restricted access to only the directories you specify, so you can give an FTP user access to one part of a site, but not others.
In this tutorial, I’ll show you how to set up FTP accounts in cPanel.
Creating a New FTP User Account in cPanel
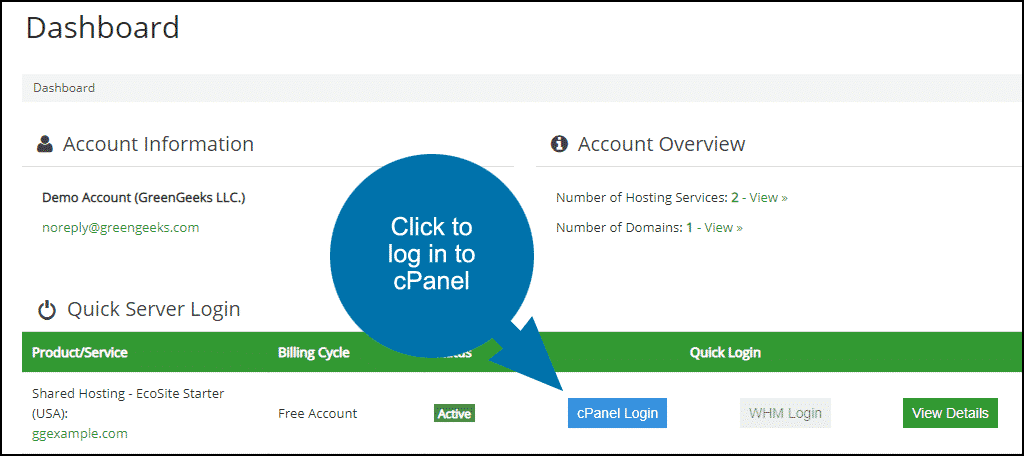
Log in to GreenGeeks and go to cPanel by clicking the “cPanel Login” button in the “Quick Server Login” section.
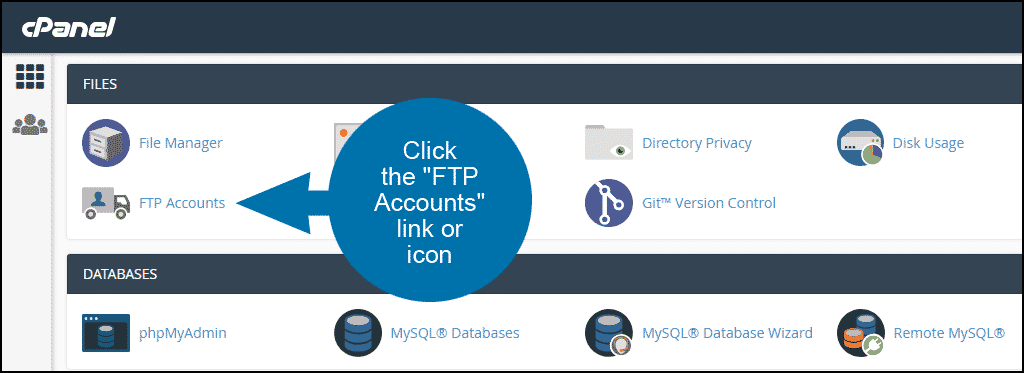
In the “FILES” section, click the “FTP Accounts” link or icon.
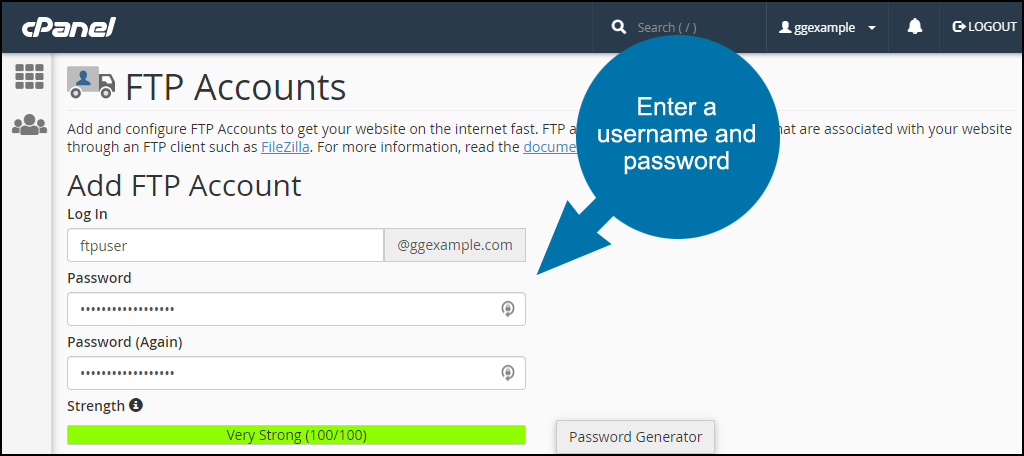
Enter the FTP username for the account in the “Log In” field.
Enter the FTP password in both the “Password” and “Password (again)” fields.
Note that the system will analyze your password or passphrase and reject it with a password strength error if it is too short or not sufficiently complex.
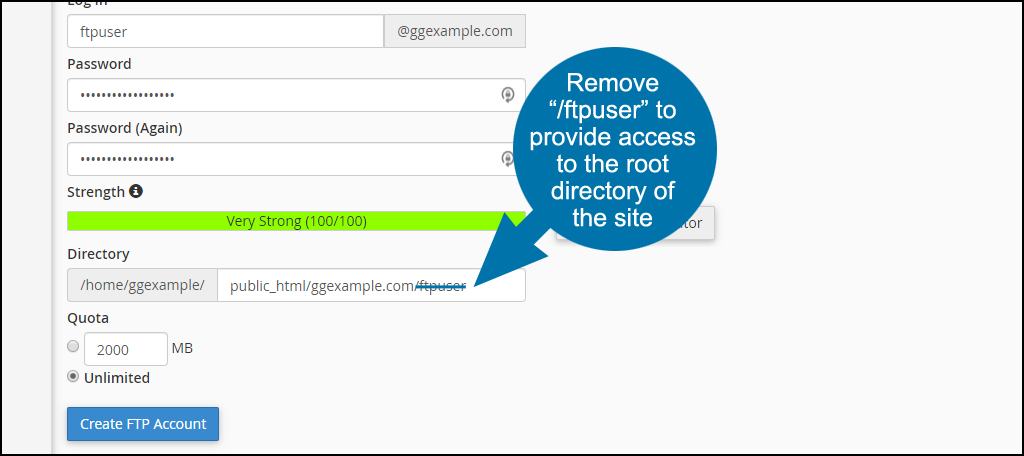
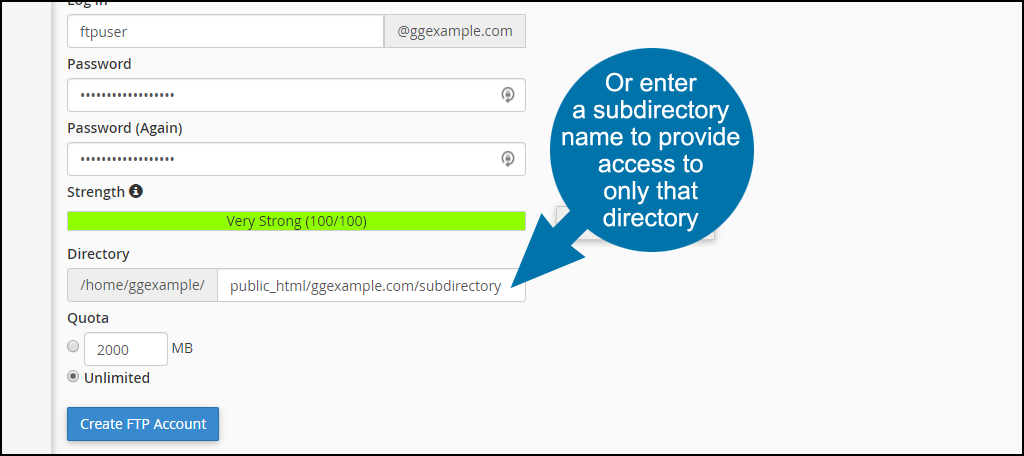
The “Directory” field is automatically populated with public_html/domain.tld/ftpuser (ftpuser is the username that you entered in the “Log in” field and domain.tld is the cPanel account domain).
The user you are creating will not have access to any directories above what is set in the “Directory” field. So you have to change the default entry if you want the new user to have access to your root directory.
In this example, the root directory of the site is “ggexample.com/“. Yours will be different depending on your GreenGeeks account information.
If, however, you intend to create a user that has restricted access to only a specific directory, replace /ftpuser in the “Directory” path with the name of the directory you wish to allow the user to access.
The subdirectory does not have to exist, cPanel will create it for you when the FTP user is created.
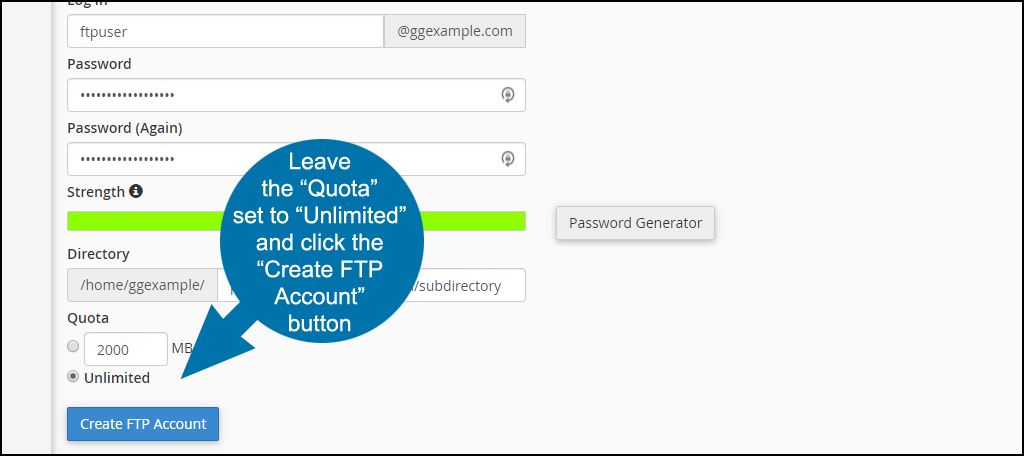
Setting a quota for the user will prevent them from uploading files once the quota is reached. To prevent that problem, leave the “Quota” set to “Unlimited.”
Click the “Create FTP Account” button.
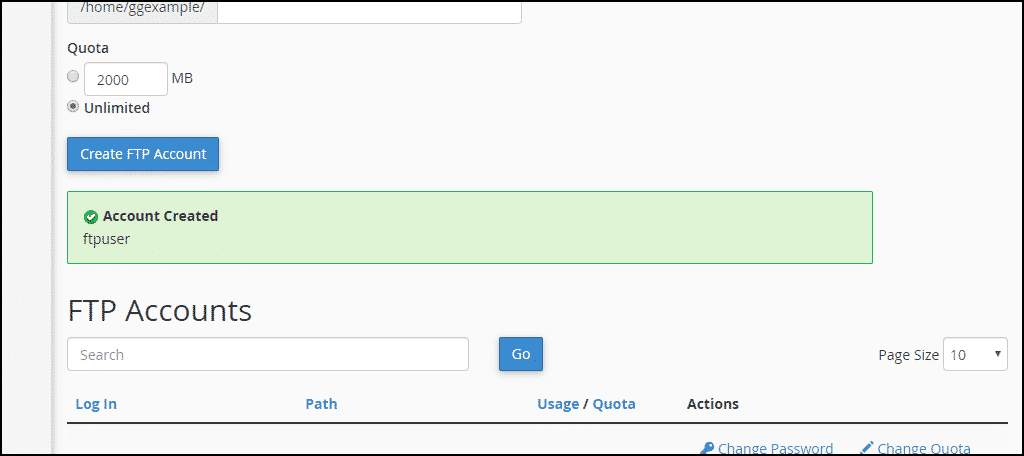
When the user is created, you will see an “Account Created” success notice.
Logging in to an FTP User Account
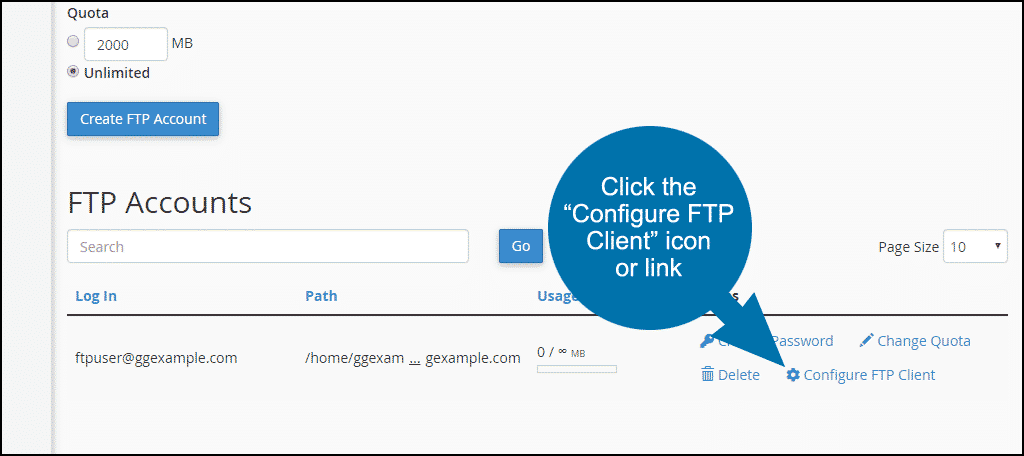
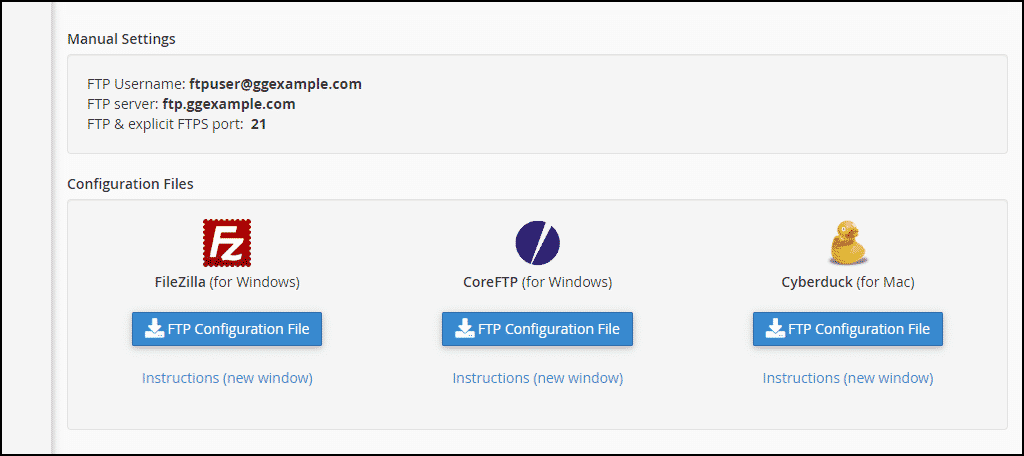
Once the FTP account is set up, scroll down to the “FTP Accounts” section of the page and click the “Configure FTP Client” link.
The manual FTP settings and downloadable configuration files for popular FTP programs such as FileZilla and CoreFTP will be shown.
Download the files for your program of choice and use them to configure the tool.

