There are two options for backing up your GreenGeeks website.
If your account is under 10 GB in size, you can use the cPanel backup tool. For larger accounts, you can make a backup yourself.
Option 1: Use the cPanel Backup Tool
If your account is over 10 GB in size this option will not be available. Please see the section on making your own backups.
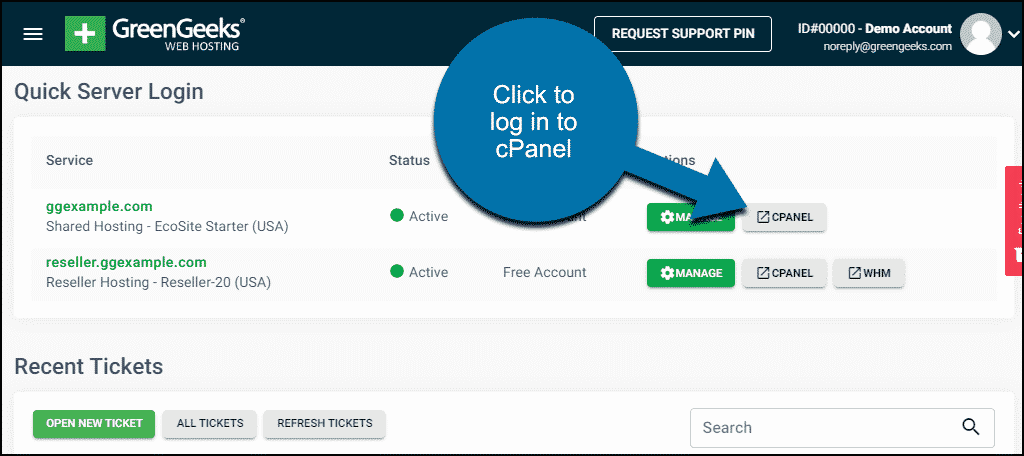
Log in to GreenGeeks and go to cPanel by clicking the “cPanel” button in the “Quick Server Login” section.
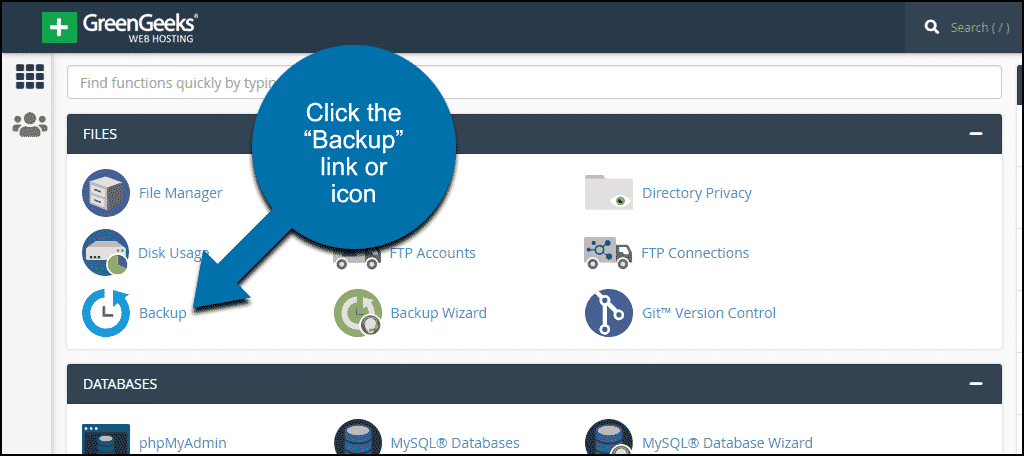
Click the “Backup” link in the cPanel “Files” section.
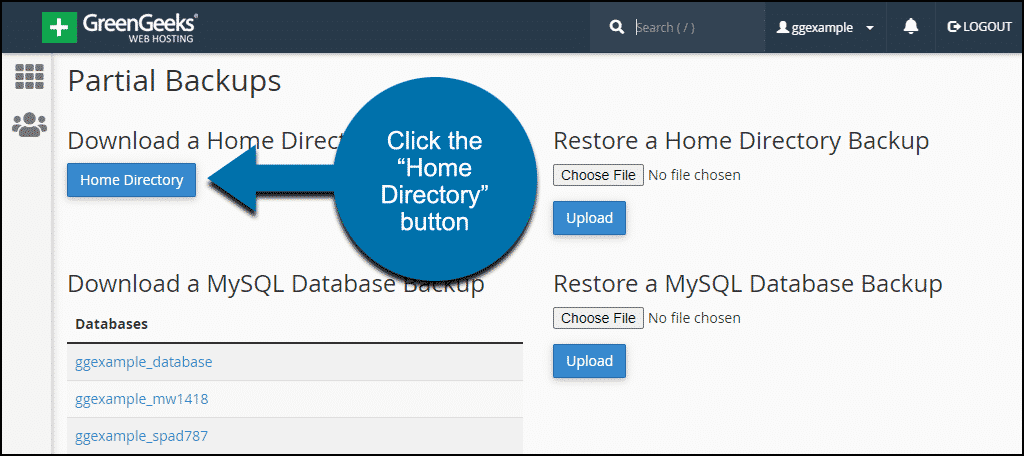
Click the “Home Directory” button to download a backup of your website home directory.
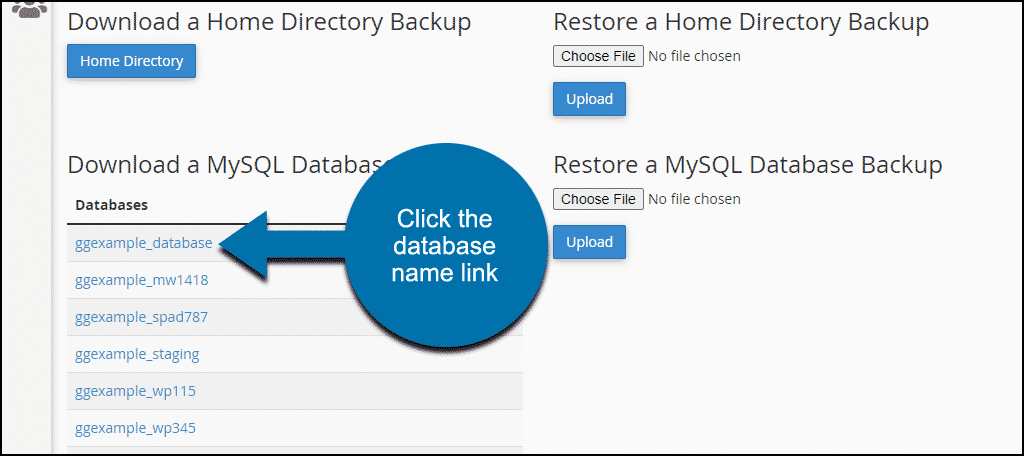
If your website uses a MySQL database, download a copy of the database by clicking the database name in the “Download a MySQL Database Backup” list.
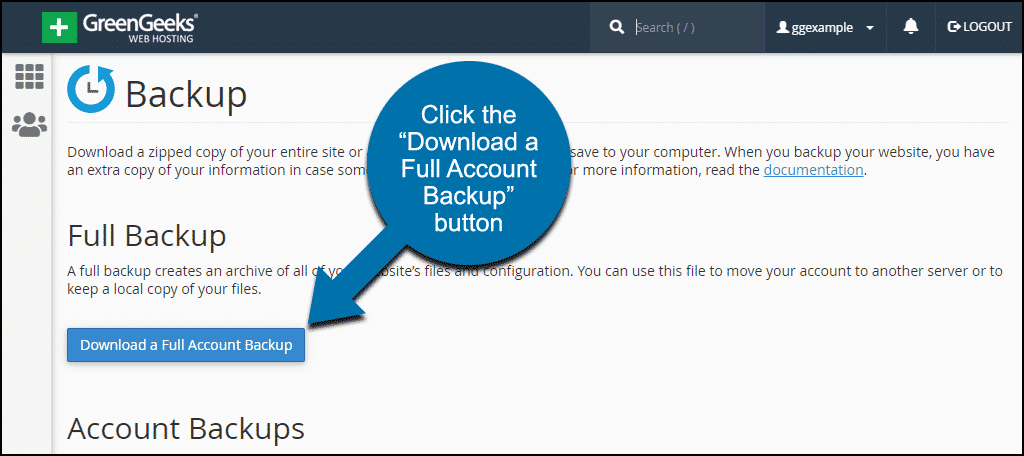
If you need a backup your entire cPanel account, click the “Download a Full Account Backup” button.
cPanel backups saved to your home directory will be automatically deleted after 48 hours. Once you’ve generated a backup, please download it to your local computer as soon as possible.
cPanel backups are disabled for accounts greater than 10 GB in size. For accounts larger than 10 GB, follow the backup instructions below. Alternately, you can request that GreenGeeks generate a full cPanel backup. There is a $5 fee (per cPanel) for backups performed by GreenGeeks.
Option 2: Make Your Own Website Backups
If you’re running a content management system, such as Drupal, WordPress, or any web site that runs a database, you’ll have to back up the database as well as the website files. If you’re running a simple website, you’ll just back up the website files.
Backing up Website Files
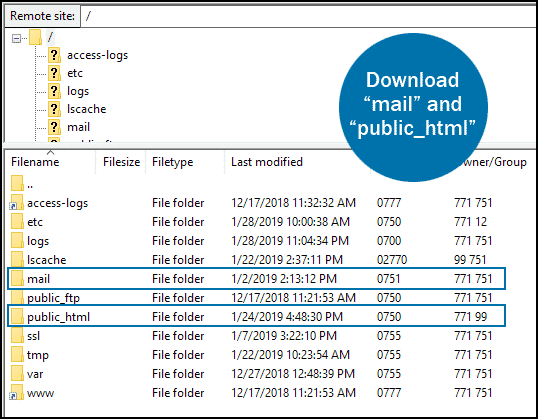
We recommend using an FTP program such as FileZilla to back up your files. Copy the entire /public_html directory from your web hosting account to your local PC. If your email is also hosted with GreenGeeks, you can back it up by downloading the /mail directory.
Backing up Databases
Log in to GreenGeeks and go to cPanel by clicking the “cPanel Login” button in the “Quick Server Login” section.
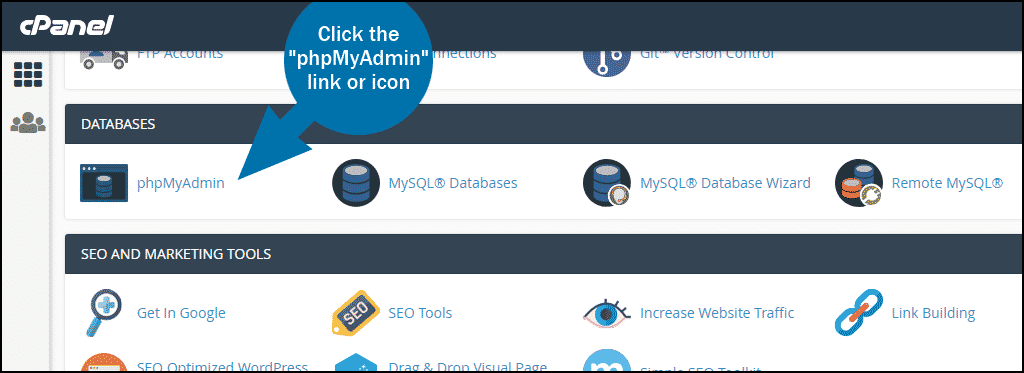
In the “Databases” section, click the “phpMyAdmin” link or icon.
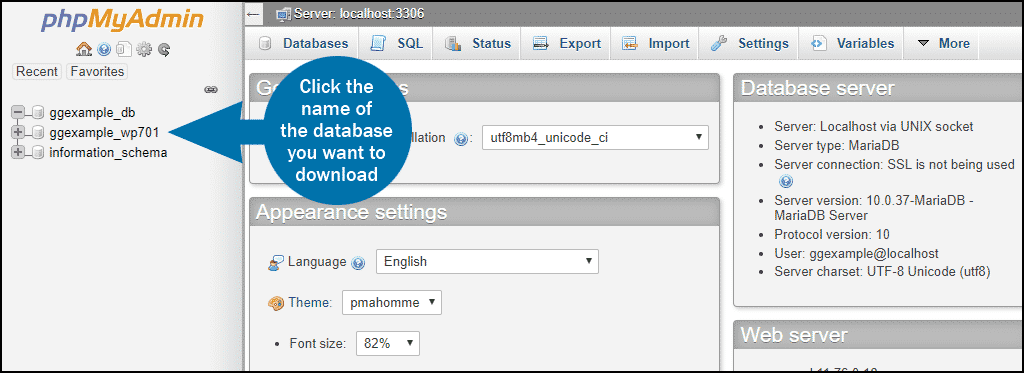
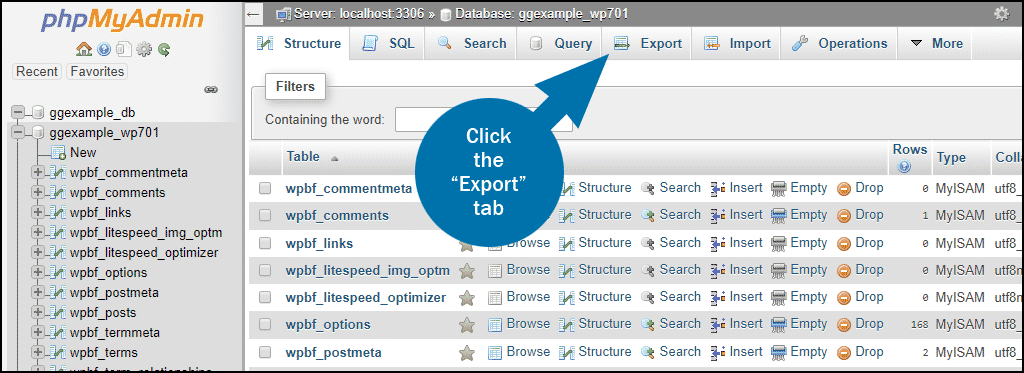
Click the name of the database you want to download.
Click the “Export” tab.
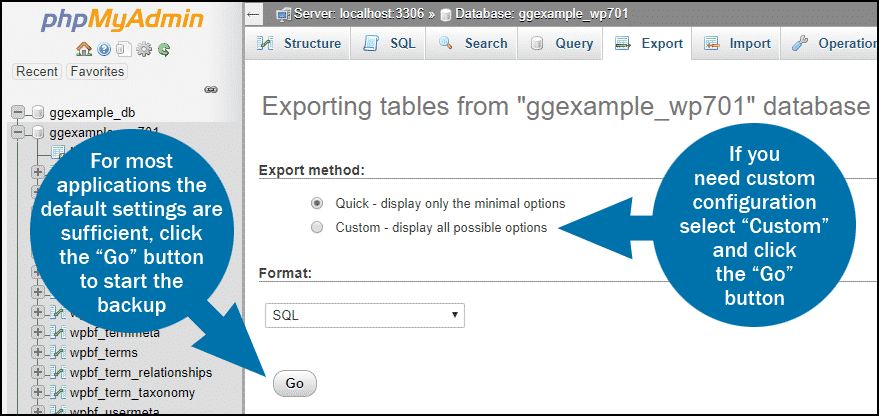
For most common applications, such as preparing a backup that will also be imported using phpMyAdmin, the default settings are sufficient, click the “Go” button to start the backup.
To select only specific tables, or to export the database structure, etc., select “Custom” and click the “Go” button to access the advanced options screen.
The backup will be downloaded to your computer as a .sql file.

