You have two methods for setting up email through your GreenGeeks account: from your account manager screen and through cPanel.
Method 1: Setting Up Email from the Account Manager
Log into your GreenGeeks account.
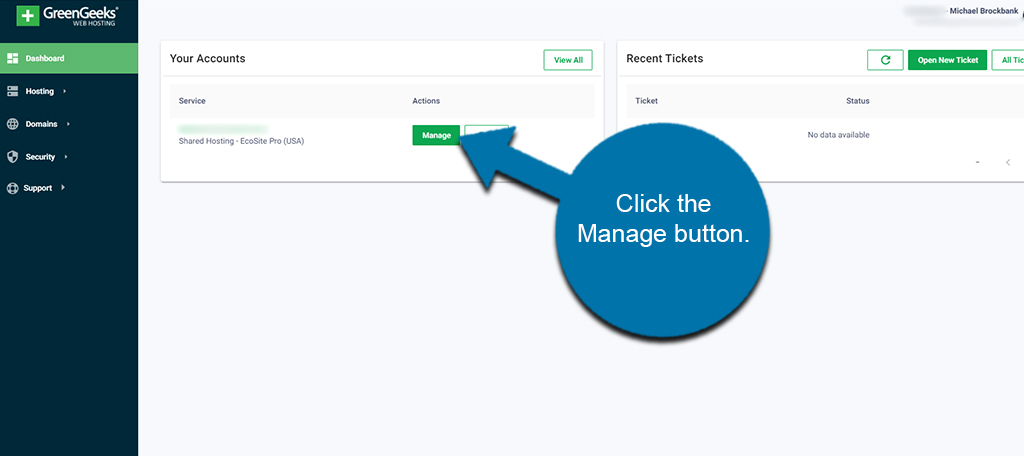
From your Dashboard, click the “Manage” button next to the service you wish to edit.
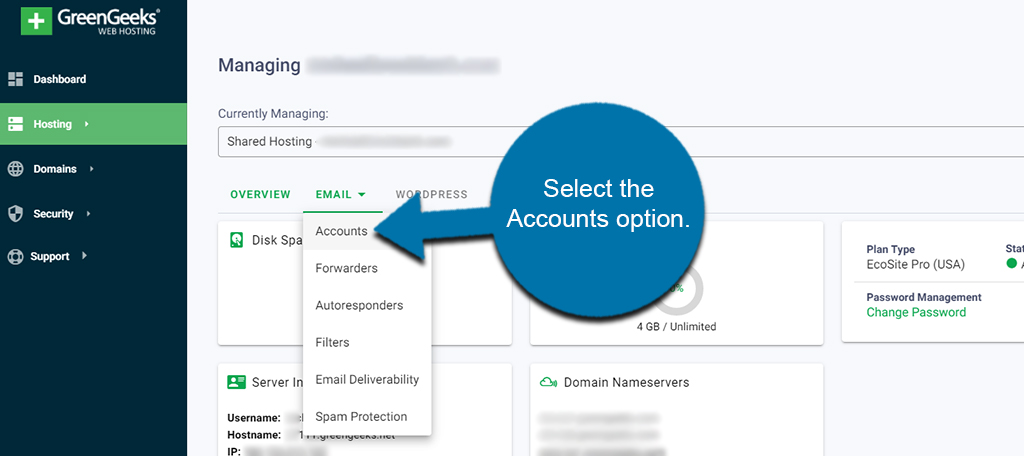
Click the “Email” option to open the dropdown window. This will open a list of management tools.
Click the “Accounts” option at the top.
Input the email address and password you wish to use.
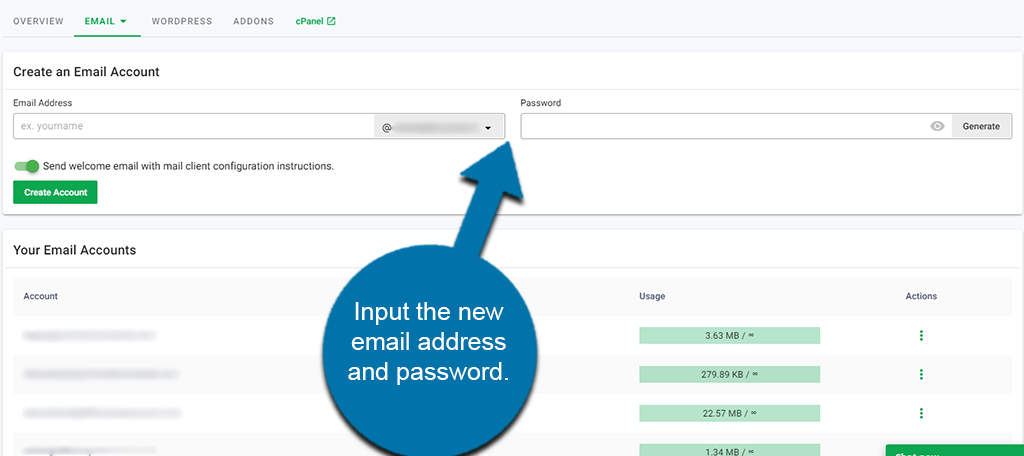
NOTE: You can use the dropdown option in the Email Address field to change which domain you want to use. Also, you can use the Generate button in the Password field to create a difficult, and more secure, password.
Click the “Create Account” button when ready.
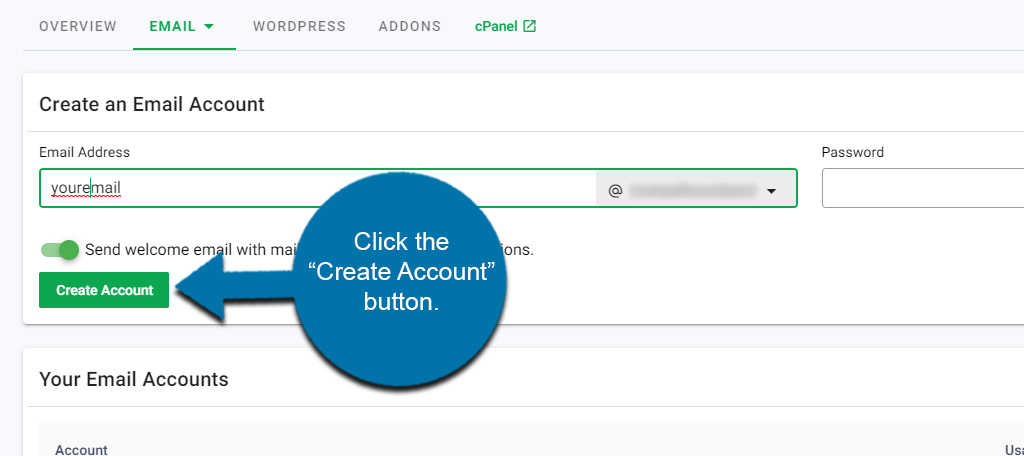
NOTE: If you leave the option to send a welcome email, the instructions for client configuration will be sent to the account. This lets you set up third-party apps like Outlook, Thunderbird, or various mobile apps.
Method 2: Setting Up Email through cPanel
When you create an email account through your GreenGeeks cPanel, you will be able to access email via IMAP, POP3 or Webmail.
To create an email account, log in to GreenGeeks and go to cPanel by clicking the “cPanel” button under the “Your Accounts” section.
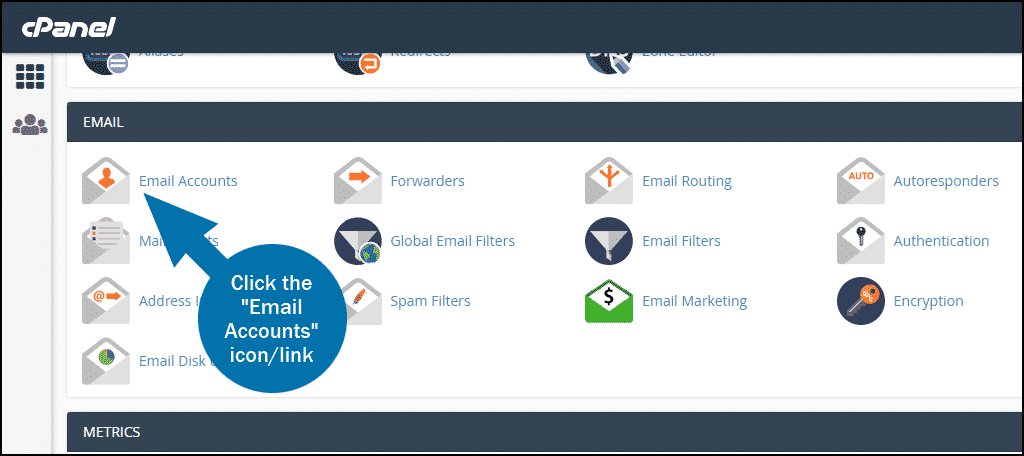
In the “EMAIL” segment of cPanel, click the “Email Accounts” icon/link.
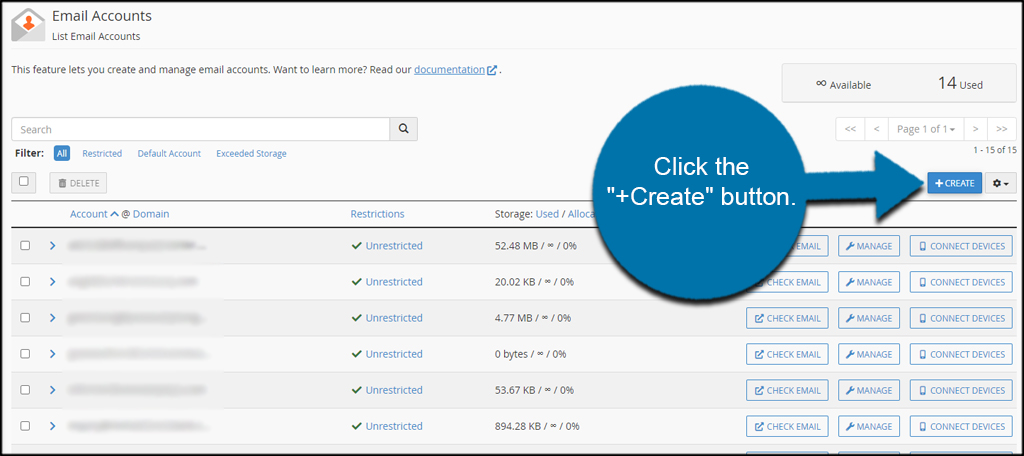
This will show you a list of all email accounts you have created. This is where you’ll access those in the future if you need to make modifications or remove the email addresses.
On the right side, click the “+Create” button.
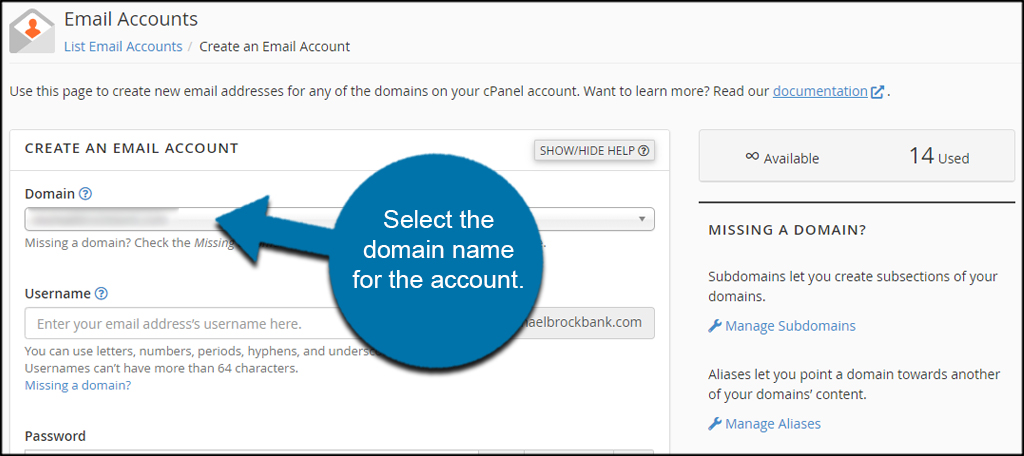
Use the drop-down window to select the domain name for the account. If you only have one website, it should be selected by default.
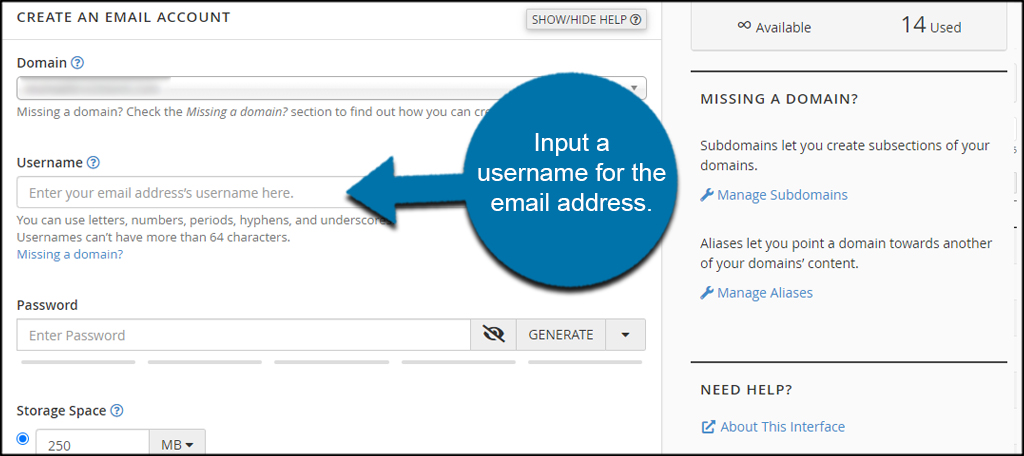
Input a username for the email address. This is the address others will use to contact you. For example, for “[email protected],” the username would be “you.”
Create a password for the email account. If you want to create a very strong password, use the “Generate” option on the right.
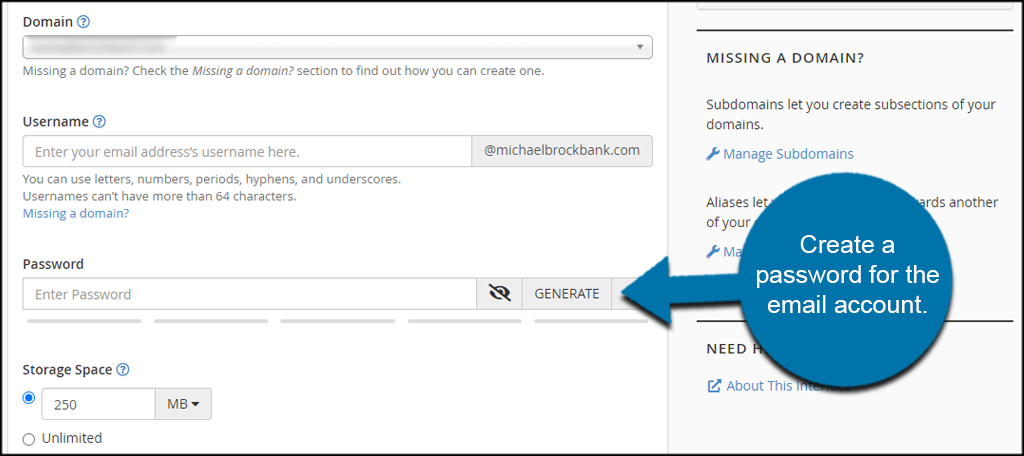
Assign allotted storage space for the address. You can set the limit of how much drive space is used by the address, or you can choose to make it unlimited.
If the account exceeds the quota specified here, mail delivery may fail, so plan accordingly.
You can also change whether to create folders automatically or not. Though, I suggest leaving this option on default unless you have a specific need.
It’s a good idea to leave the “Send a welcome email with instructions to set up a mail client” checked. This will give you a message that helps with setting up platforms like Outlook or Thunderbird email clients.
Once you’re done with these options, click the “+Create” button.
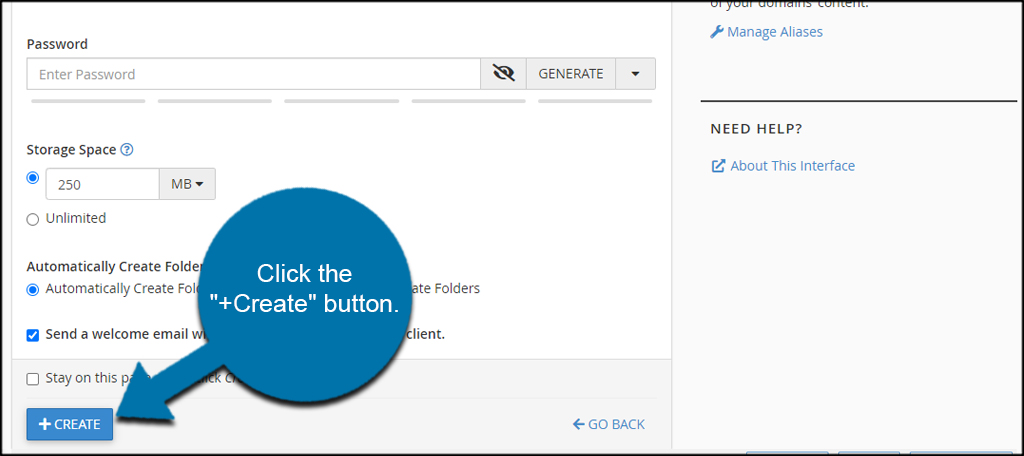
If you leave the “Send welcome email with mail client configuration instructions” option checked a configuration email will be sent to the account. That message can be accessed via webmail.
You can also consult our Knowledge Base articles on setting up popular email clients such as Microsoft Outlook, MacMail, Thunderbird, and iPhone and iPad.

