Your GreenGeeks hosting account includes the ability to customize PHP environment variables without the assistance of our technical support staff.
Today, I’ll show you how to make changes to the PHP version and environment variables using our cPanel interface.
This tutorial uses the default cPanel Basic (or “paper_lantern”) theme. Other themes may not reflect what you see here.
How to Change the PHP Version
In order to customize your PHP settings, you must select a custom PHP version. You cannot change the PHP settings for the native (default) PHP version.
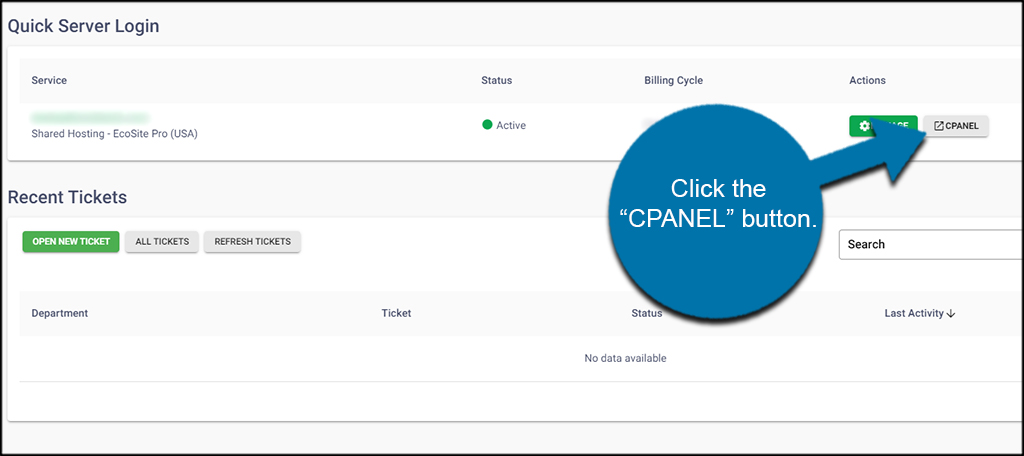
Log in to GreenGeeks and go to your cPanel account by clicking the “cPanel Login” button in the “Quick Server Login” section.
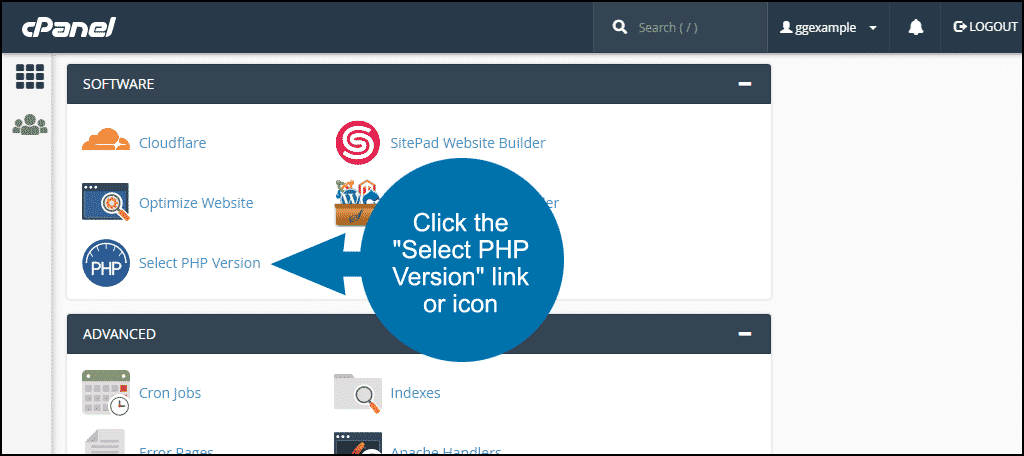
In the “Software” section, click the “Select PHP Version” link or icon.
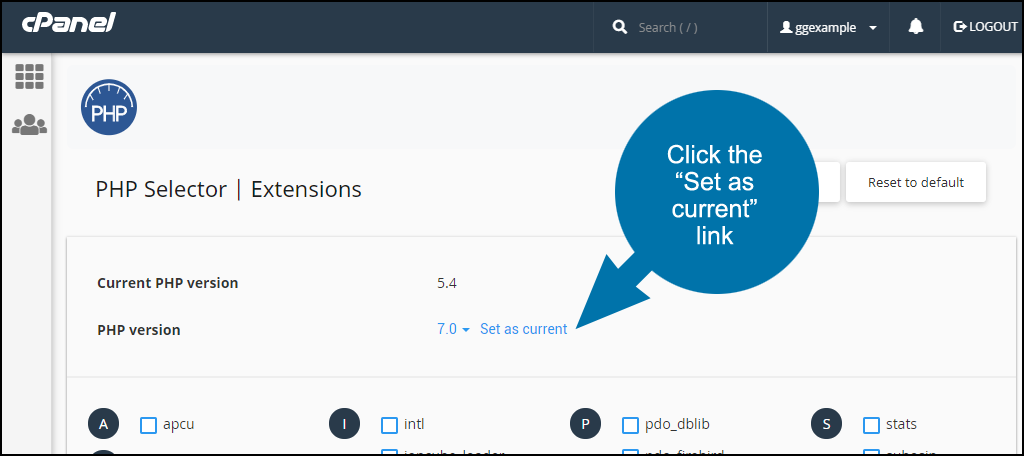
Select the version you wish to use from the drop-down menu.
- By default, the latest stable version (called the “native” version) will be selected and is already active. You will see an orange warning message regarding the native version. Remember, you can’t change the settings for the native PHP version, so if you wish to use the native version, further customization isn’t possible.
- Also, while you have the option to select older versions of PHP, unless you have a specific need for an older version, we recommend using one of the latest major versions.

After choosing the version from the drop-down, click the “Set as current” link.
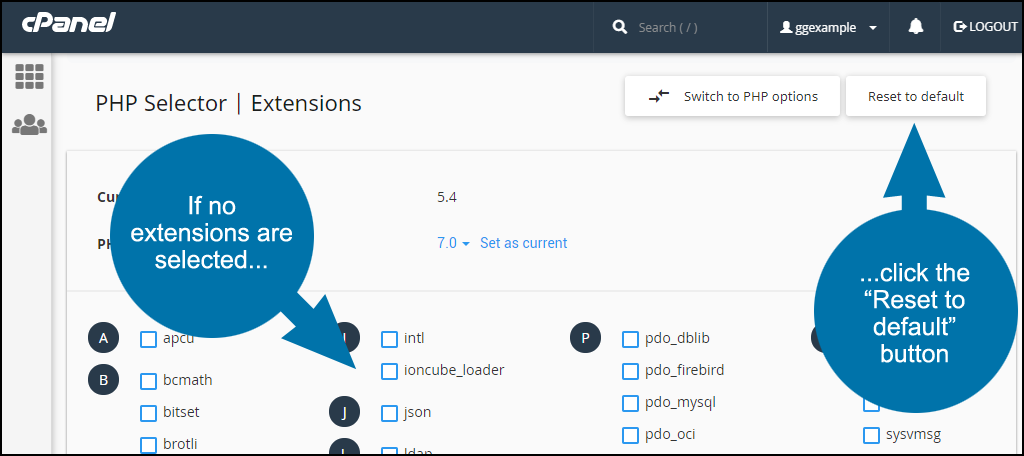
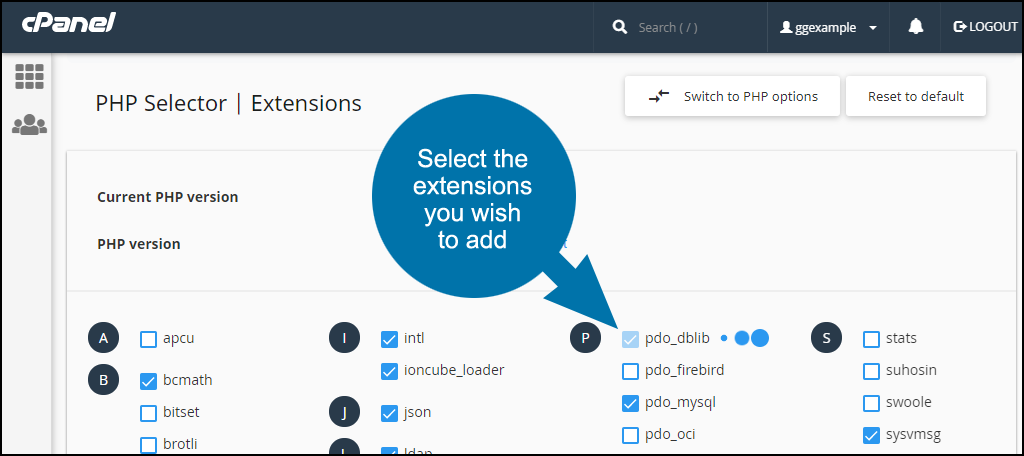
The version you select may not have any extensions selected. If that’s the case, and you want to enable the most commonly used extensions, click the “Reset to default” button.
Then select any other extensions you wish to add. Your selections are automatically saved and loaded on the server.
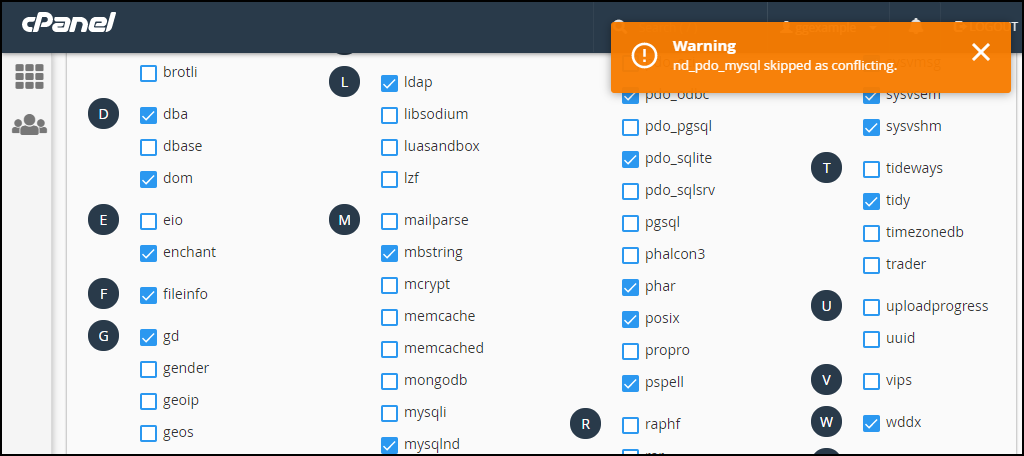
The system will not allow you load conflicting extensions. For example, if the “pdo_mysql” extension is selected, you will not be able to select “nd_pdo_mysql.” You must deselect the conflicting extension – in this case, “pdo_mysql” – before you can select “nd_pdo_mysql.” It may not always be obvious where the conflict lies, so you may have to Google the extension you wish to add to find potential conflicts.
If you run into problems on your website after loading an extension, come back and click the “Reset to default” button for your PHP version.
How to Configure PHP Settings
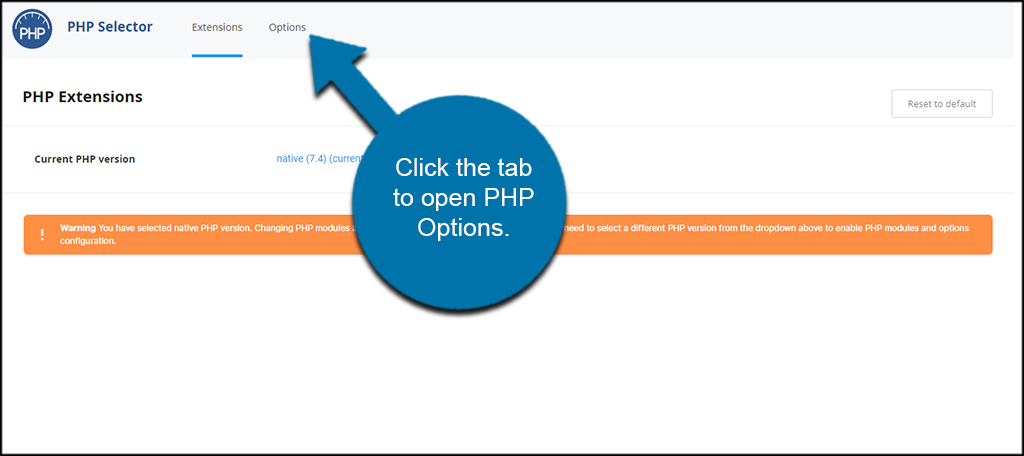
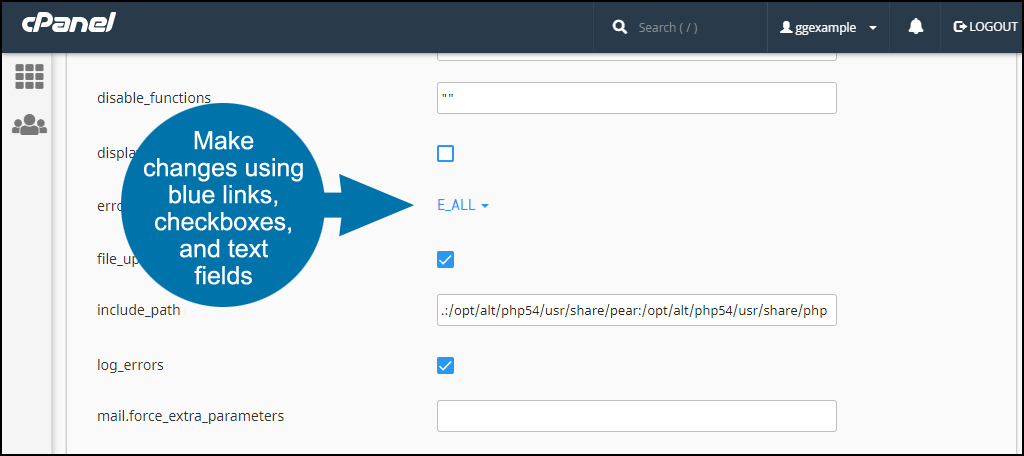
To change PHP settings like memory limits and execution time, click the “Options” tab.
The PHP settings apply to the currently selected PHP version. If you change the PHP version, any settings changes you made here will not apply to the newly selected version.
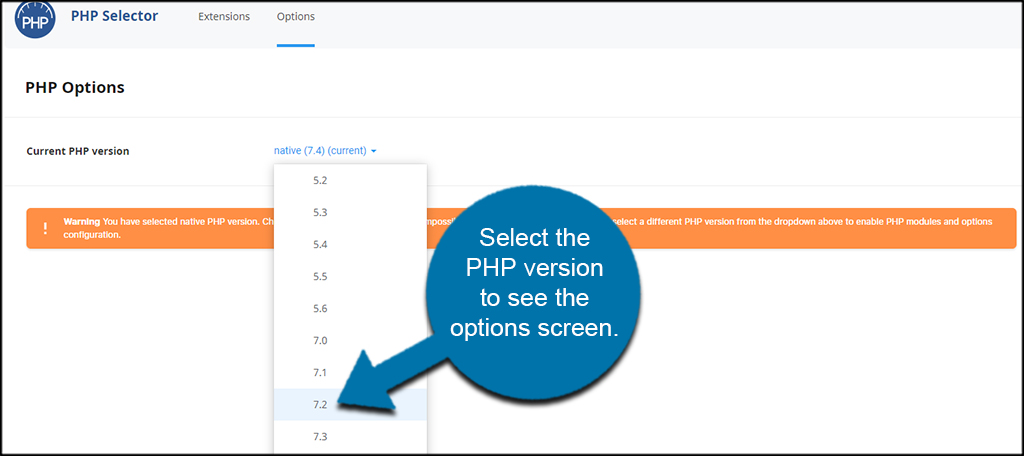
Using the drop-down selector, choose the version of PHP to see it’s Options window.
To make changes, click the blue checkboxes, enter text into the text fields, or click a blue dropdown link. Any changes you make here will also be automatically saved.
Viewing the Changes
You can check to make sure your changes have been applied by creating a phpinfo.php file. Add the following line of code to a blank text file:
<? phpinfo(); ?>
Name the file phpinfo.php and upload it to the root directory of your site.
Visit http://ggexample.com/phpinfo.php to view the PHP settings (replacing ggexample.com with your domain name).