A browser-trusted SSL(Secure Sockets Layer) certificate is crucial for a successful website.
SSL certificates not only offer protection to visitors, but search engines like Google also put more emphasis on sites secured with SSL(https://).
GreenGeeks automatically manages the SSL certificates for your domains, so adding SSL certificates is easy!
DNS Requirements: Domain Control Validation(DCV)
GreenGeeks automatically issues Lets Encrypt SSL certificates for all domains using DNS-based Domain Control Validation(DCV), which involves verifying that the requester of the SSL certificate has control over the domain.
DCV uses DNS or HTTP verification and works for domains pointed to the GreenGeeks Anycast Nameservers or those using 3rd party nameservers with A records, including Cloudflare.
Adding a new SSL Certificate
Whenever a new domain is added, the backend server will attempt to complete DCV for that domain to issue an SSL certificate. This process usually takes no more than 5-10 minutes.
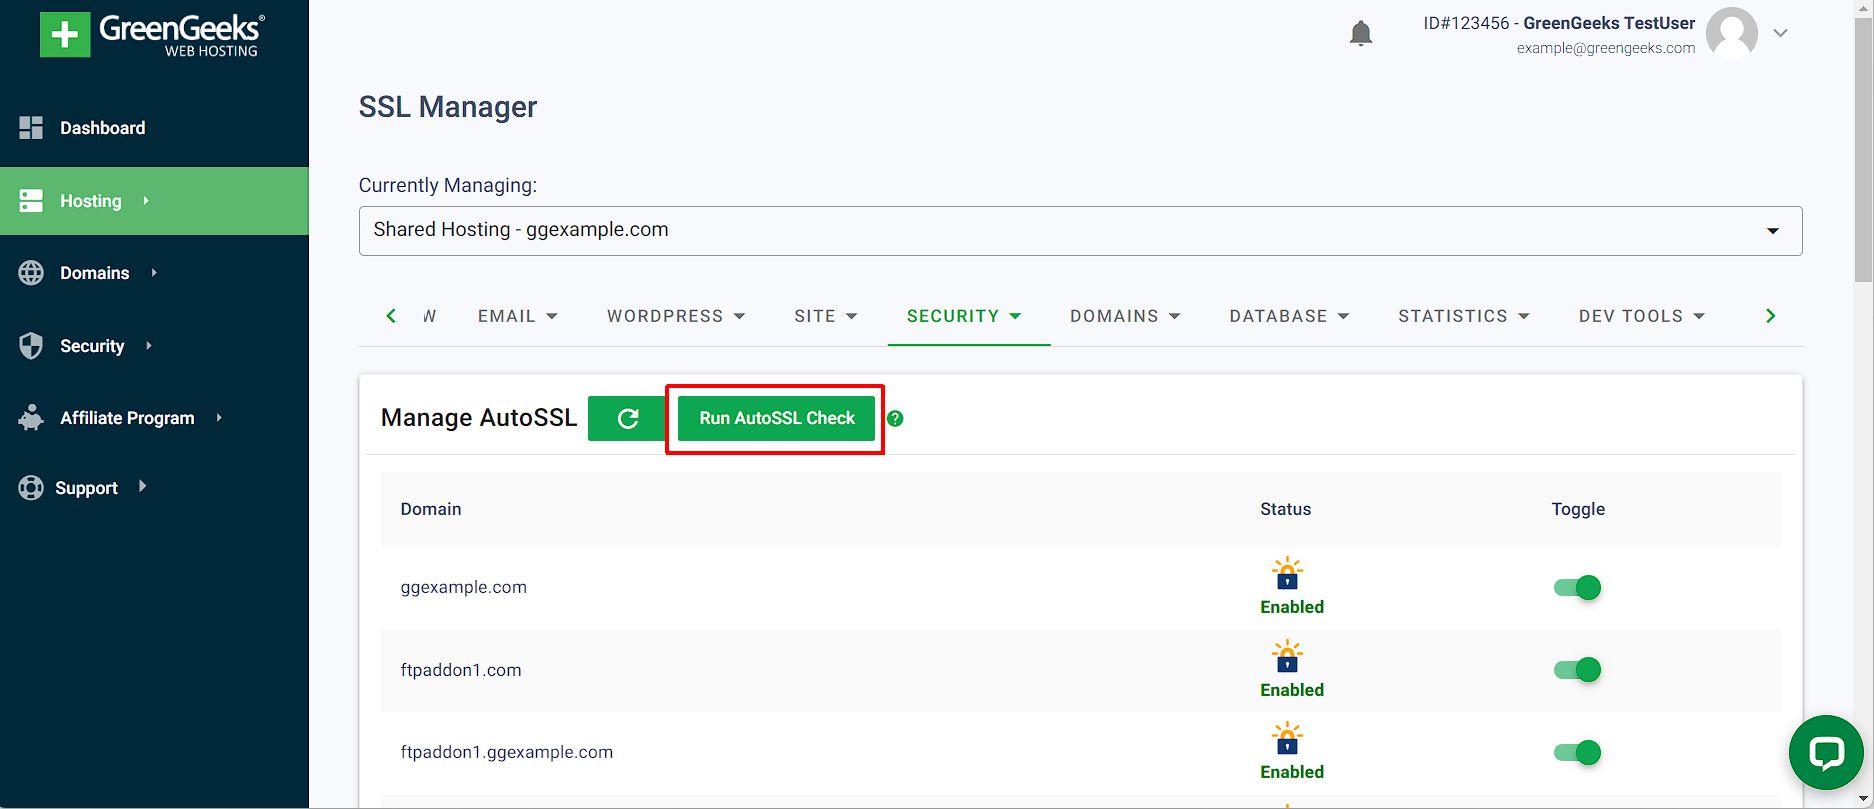
Run AutoSSL Check
The first DCV check happens automatically a few minutes after a domain is added, but it’s also possible to run an AutoSSL DCV check on-demand at any time.
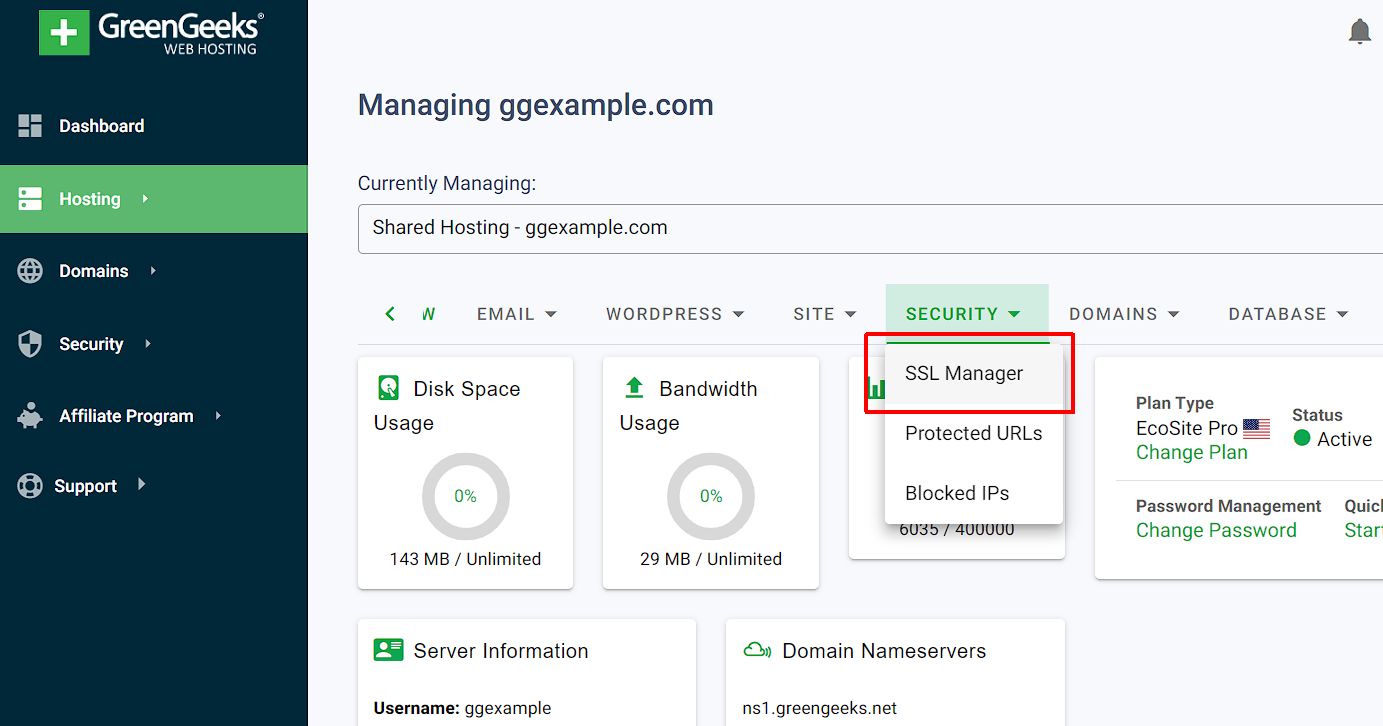
GreenGeeks Dashboard
- Click the Manage button next to your hosting account.

- From the Hosting Management view, open the Security drop-down menu and select the SSL Manager.
- On the SSL Manager page, click “Run AutoSSL Check” to run an AutoSSL check for all domains on that hosting account.
cPanel
- Login to cPanel.
- Click the cPanel icon in your GreenGeeks Dashboard.
- Within cPanel, Scroll down to the “Security” section.
- Click on the “SSL/TLS Status” icon.
- Click the “Run AutoSSL” button.
- AutoSSL will begin requesting, verifying, and installing the SSL certificate. You can monitor the progress on the same page.
- Once the AutoSSL process is complete, you will receive a confirmation message indicating whether the SSL certificate installation was successful.
Post Installation
After installation, you should verify that the SSL certificate is working correctly; try to access your website via HTTPS (e.g., https://www.yourdomain.com) and check for the padlock icon in the browser’s address bar.
For WordPress-based websites, GreenGeeks recommends updating the URLs directly within the MySQL DB to include HTTPS to avoid the additional performance overhead of using a plugin to do this, like Really Simple SSL.
DNS Not Pointed / Installation Fails
If GreenGeeks cannot complete DCV checks for a domain, such as when the DNS isn’t pointing to GreenGeeks, we won’t be able to issue the SSL certificate.
If you manage your DNS, check out this article about DNS updates that may be necessary to use Let’s Encrypt.
GreenGeeks will continue to re-try the DCV daily until we can issue the SSL certificate or the domains excluded from AutoSSL.
Exclude Domain from AutoSSL Coverage
You can exclude a specific (sub)domain from the AutoSSL DCV check by disabling AutoSSL coverage on that (sub)domain.
To exclude a domain, use the toggle within the SSL Manager in your GreenGeeks Dashboard, or access the SSL/TLS Status icon directly in cPanel.
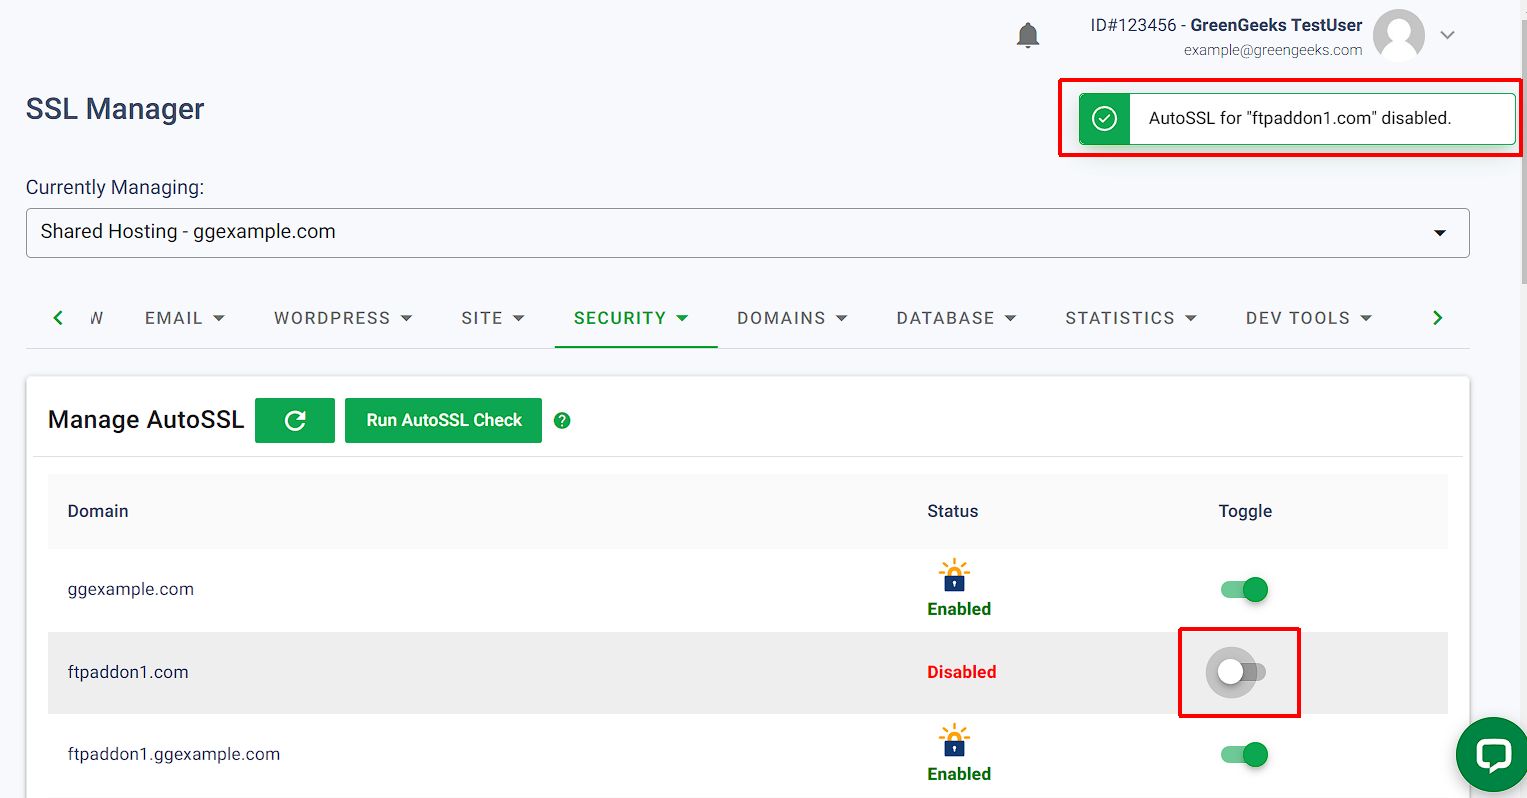
GreenGeeks will not manage the SSL for excluded domains. If you wish to use SSL on an AutoSSL-excluded domain, the certificate will need to be installed manually.