You can move files in your GreenGeeks account using an FTP program, but if you prefer a web-based alternative, there is a File Manager built into cPanel.
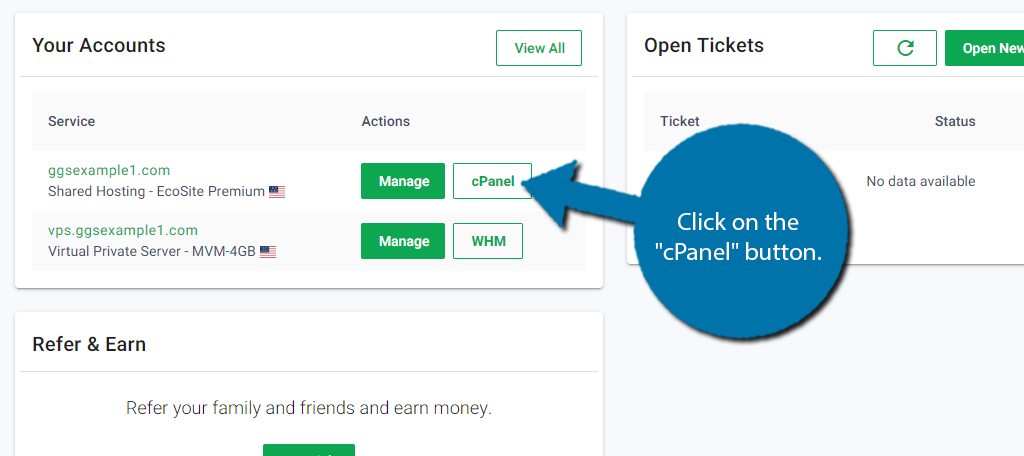
To access the File Manager, log in to GreenGeeks and go to cPanel by clicking the “cPanel” button.
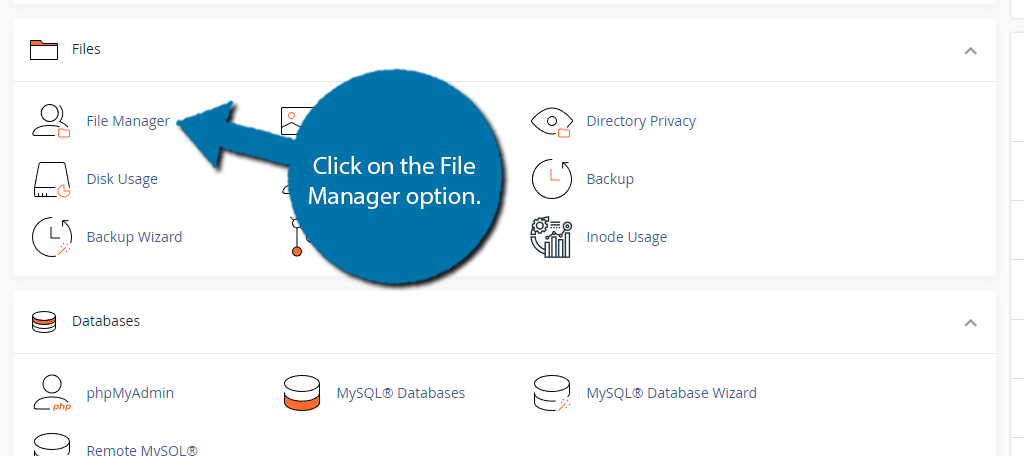
Once inside the cPanel, locate the Files section and click on the File Manager option.
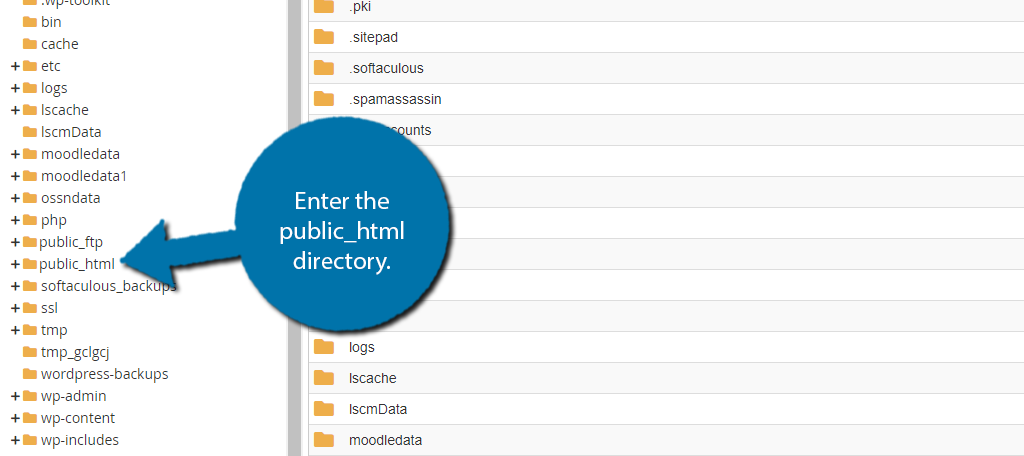
Once you are inside the file manager, you’ll want to enter the public_html directory because that is where all of the WordPress files are located.
To Move a File Using the cPanel File Manager
The File Manager gives you two ways to move files.
The first is the more traditional method of dragging files where you want them to go. Simply click and drag the file to the desired location.
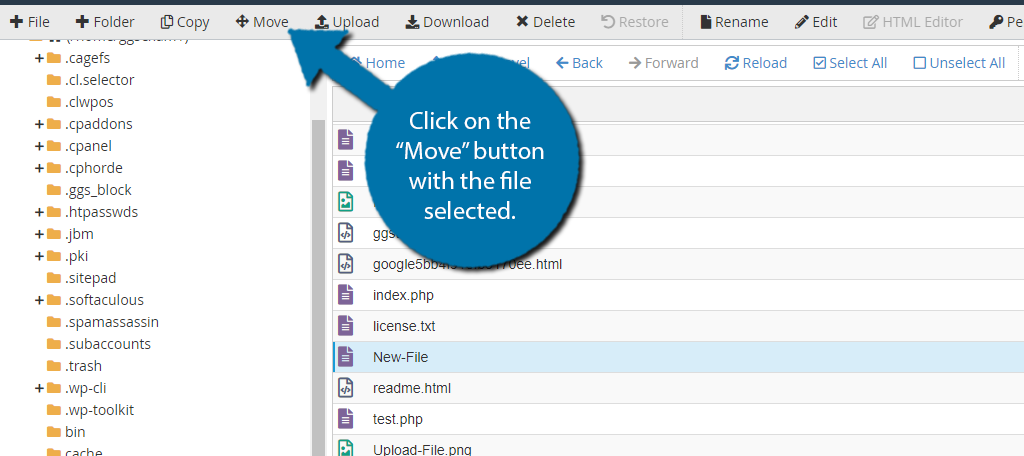
The other method is to use the “Move” button.
First, select the file you want to move (it will be highlighted blue when selected), then click on the “Move” button.
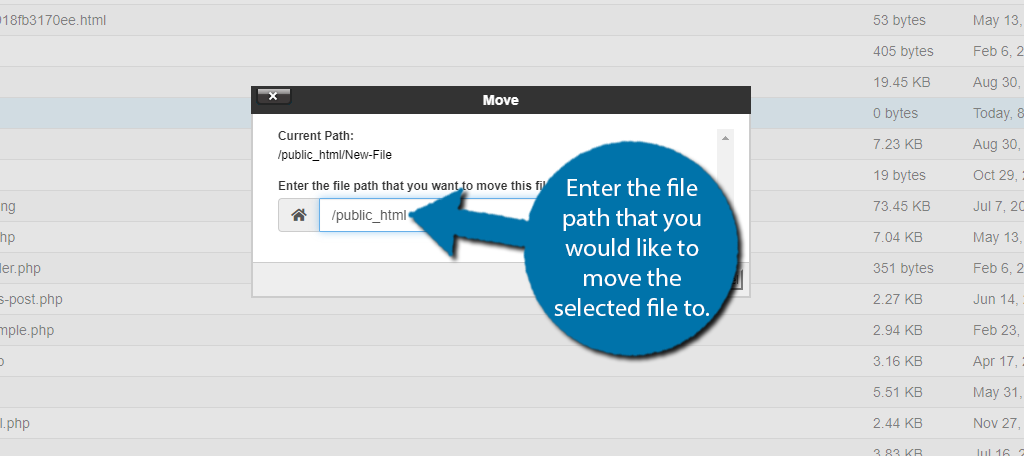
You will then be prompted to enter the file path that you would like to move the selected file to.
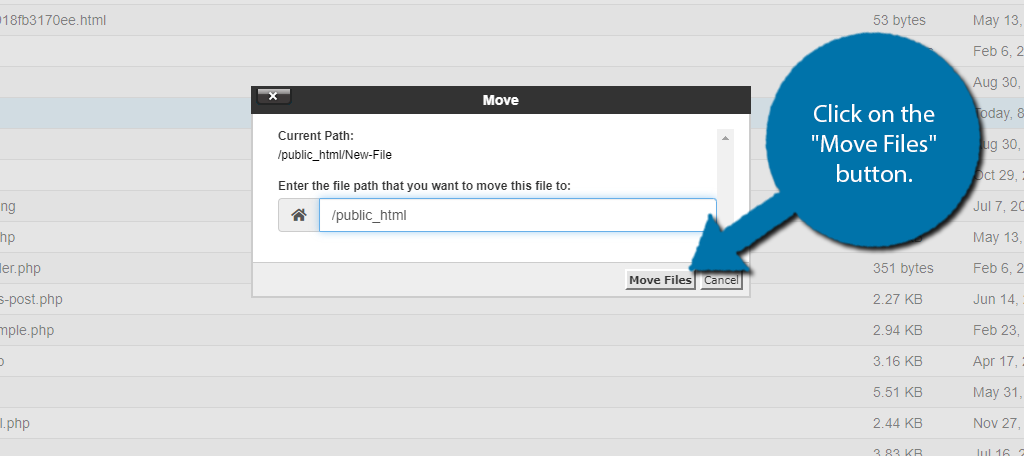
Once you have entered the file path, click on the “Move Files” button.
You may also be interested in these files: