As a GreenGeeks reseller hosting customer, the nameservers for your customer’s domains will be default GreenGeeks DNS. If you prefer to use nameservers on your own domain (like ns1.ggexample.com), you can set the default nameservers in WebHost Manager (WHM).
Note that making these changes affects future account setups. Pre-existing accounts will retain the nameservers they were given when they were created unless modified.
Registering Private Nameservers
To be used as a nameserver, a domain must first be registered as a nameserver at the registrar, in addition to having an A record for each nameserver within the GreenGeeks DNS zone pointed to the same IP address.
If you registered the domain through GreenGeeks, here is the procedure to register the nameservers.
If you did not register the domain through GreenGeeks, log in to your domain registrar’s control panel and look for an advanced DNS setting called “Register DNS,” “private nameservers,” “personal nameservers,” etc. If you can’t find the setting, contact the registrar and let them know that you would like to set up private nameservers.
Setting the Default Nameservers in WHM
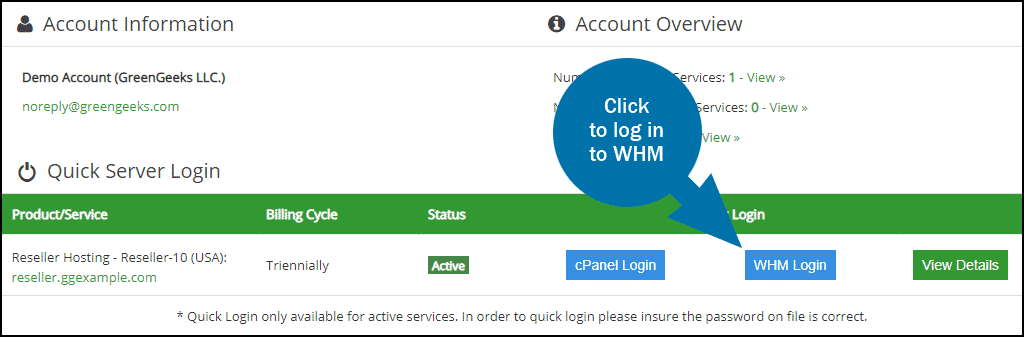
After your domain has been registered as a nameserver, and the A records created within the GreenGeeks DNS Zone, log in to GreenGeeks and go to WHM by clicking the “WHM Login” button in the “Quick Server Login” section.
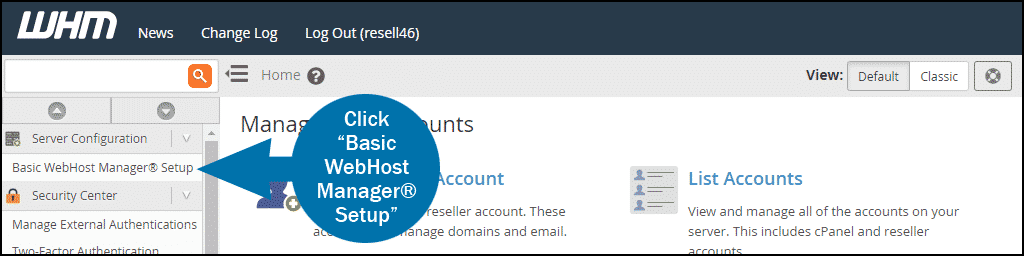
In the left navigation menu, click “Basic WebHost Manager® Setup.”
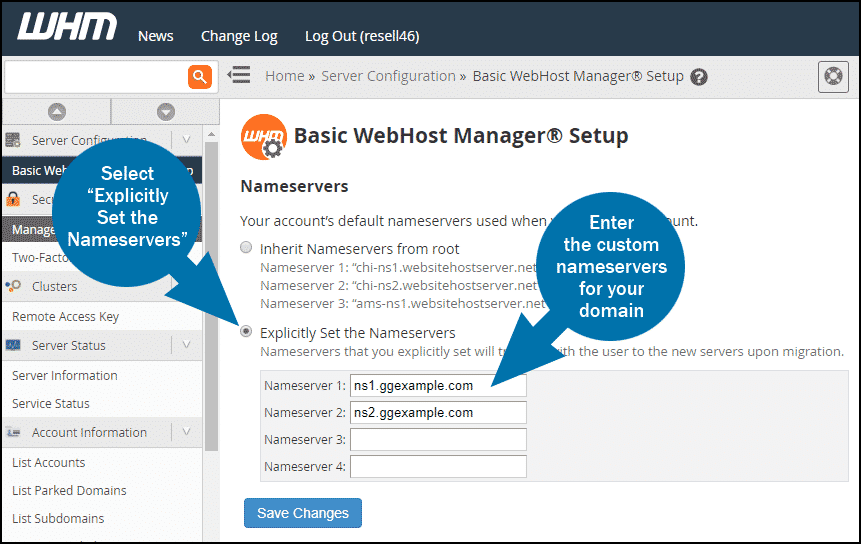
- Select “Explicitly Set the Nameservers.”
- Enter the custom nameservers for your domain.
- Click the “Save Changes” button.
All newly added domains, or accounts, will now default to the new nameservers you’ve just set.
Updating Existing Domains
It’s important to remember that making these changes only affects future domains setups. Pre-existing domains will retain the nameservers they were given when they were created.
To modify existing domains, use the DNS Zone Manager in WHM to open the DNS Zone for that domain and modify the SOA & NS records to reflect the new nameservers. Mismatched SOA & NS records may cause DNS resolution errors.
Contact the GreenGeeks Technical Support team if you need assistance updating existing SOA or NS records for your domains.