As a security measure, traditional SSH password authentication is disabled on GreenGeeks servers. This article will detail the process of setting up and using public key authentication for shell, or command line, server access.
Note: as an alternative, web-based terminal access is also available in cPanel if you need to run a quick command or two.
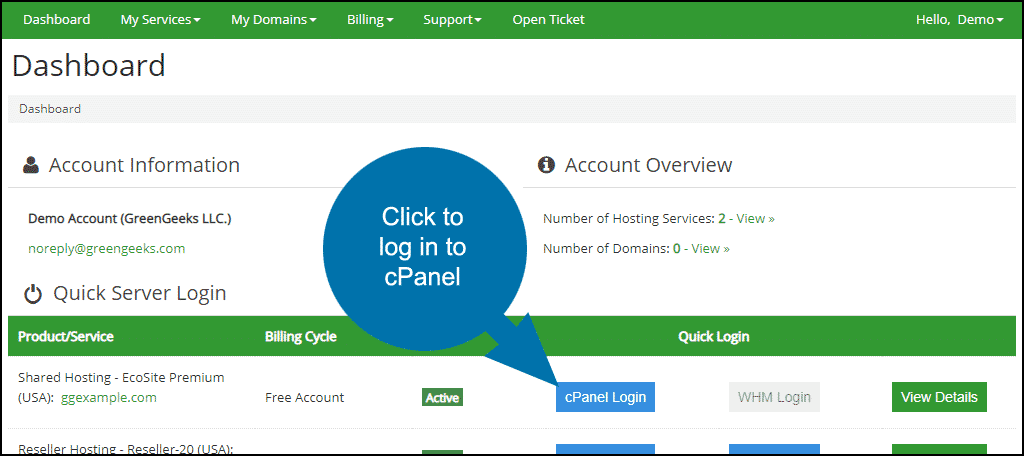
Log in to GreenGeeks and go to cPanel by clicking the “cPanel Login” button in the “Quick Server Login” section.
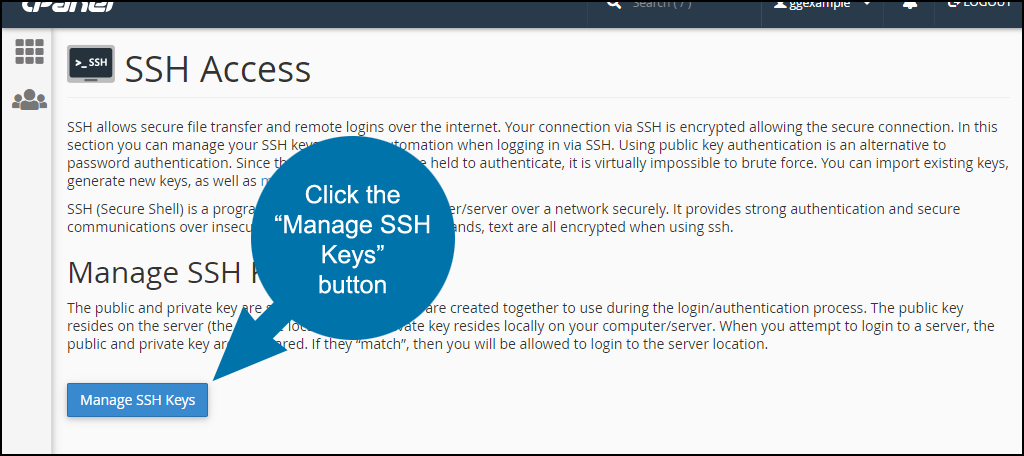
In the “SECURITY” section, click the “SSH Access” link or icon.

Click the “Manage SSH Keys” button.
Generate SSH Keys
Click the “Generate a New Key” button.

The following entries are required to generate the key pair:
- Key Name – defaults to “id_rsa,” typically there is no need to change the default value.
- Key Password – use a strong password or passphrase.
- Key Type – should default to RSA, typically there is no need to change the default value.
- Key Size – should default to 2048, we recommend leaving the default value.
Enter a password or passphrase and click the “Generate Key” button.

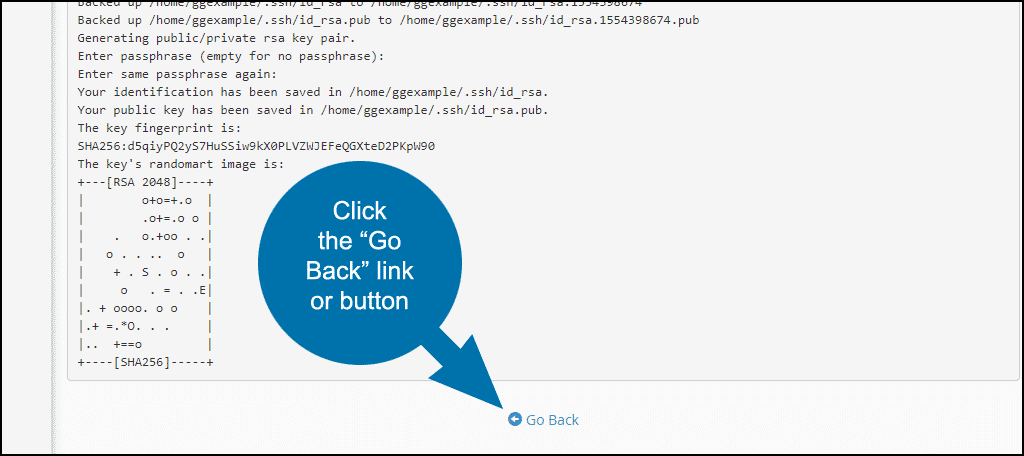
The keys will be generated and shown.
To authorize SSH access using the private key you just created, click the “Go Back” link or icon.
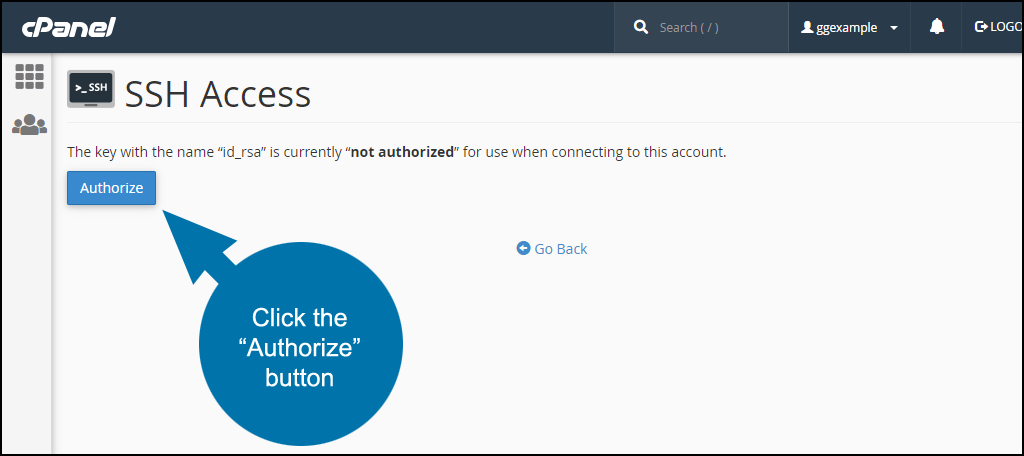
In the “Public Keys” section, click the “Manage” link or icon.

Click the “Authorize” button.
Download private keys
Click the “Go Back” link or icon to get back to the “Manage SSH Keys” page.
In the “Private Keys” section of the “Manage SSH Keys” page, click the “View/Download” link or icon.

You have a few options here: click the “Download Key” button, copy/paste the provided key, or convert the key into PuTTY’s PPK format using the Convert option.
If you click the “Download Key” button, the key will be saved on your computer with the name “id_rsa.”
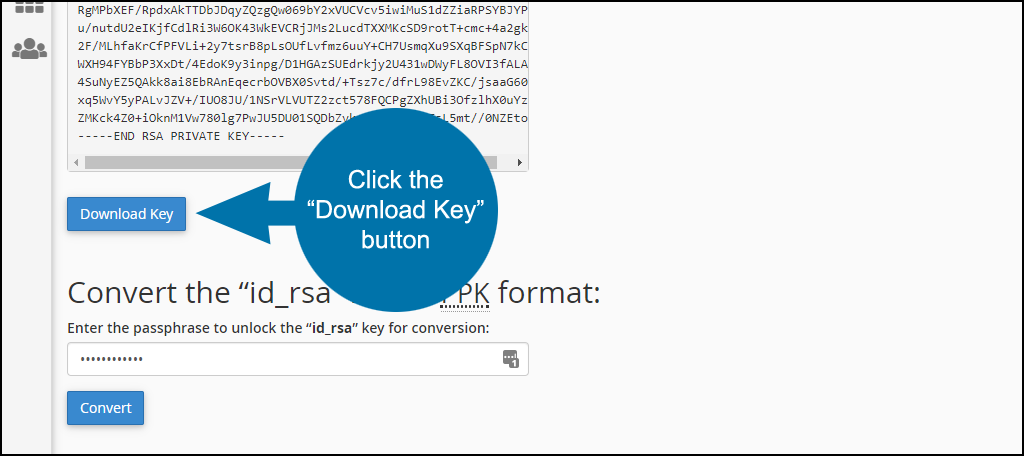
For this tutorial, we’re going to use the PuTTY SSH program so in the “Convert the “id_rsa” key to PPK format:” section, enter the password or passphrase you specified during key generation, and click the “Convert” button.

The key will be saved on your computer with the name “id_rsa.ppk.”
To follow along from this point on, you’ll need PuTTY, so if you don’t already have it, download and install PuTTY.
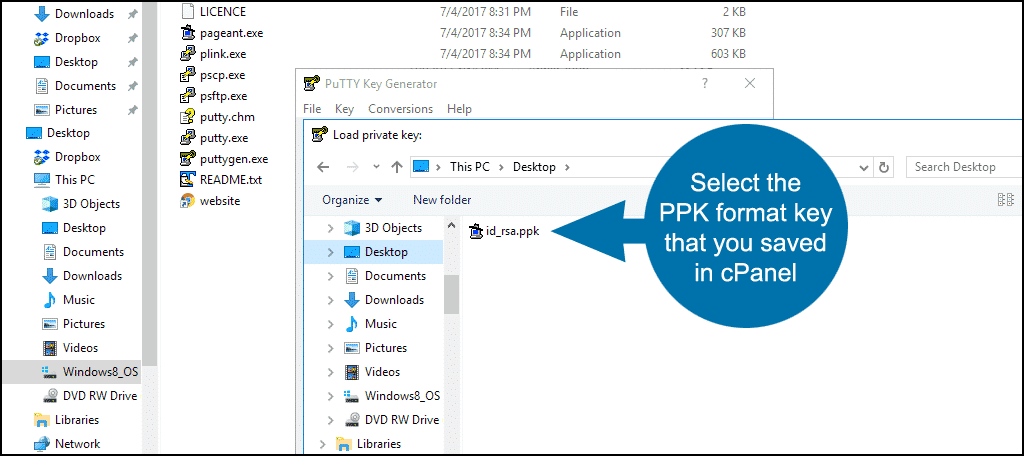
Open the PuTTy folder on your computer and run puttygen.exe.

In the PuTTY Key Generator menu, select the “File” tab and click “Load private key.”

Select the PPK format key that you saved in cPanel.
Enter the password or passphrase you specified during key generation and click the “OK” button.

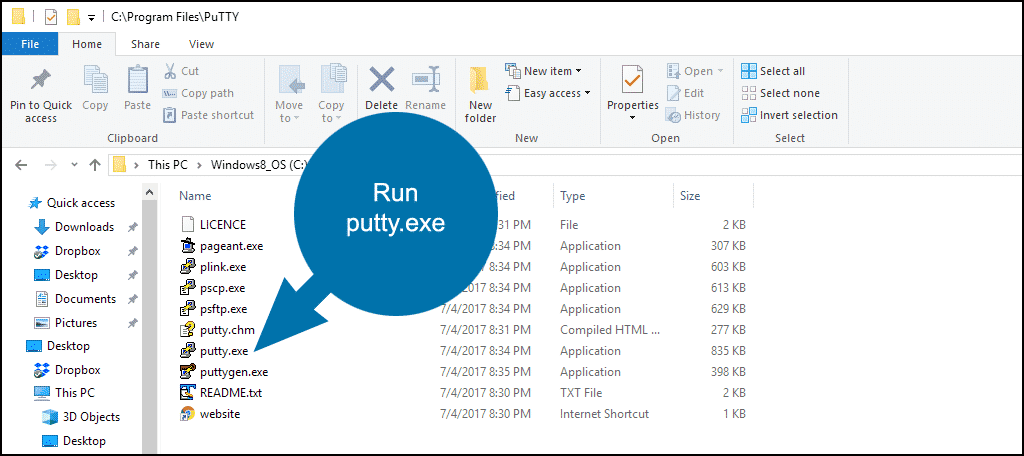
In the PuTTy folder on your computer, run putty.exe.
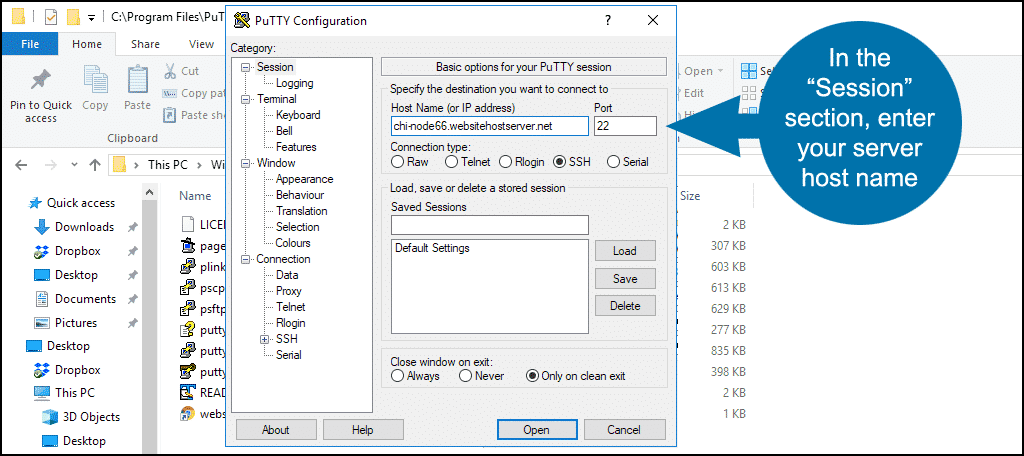
In the “Session” category, enter your server hostname into the “Host Name” field. Port is 22.
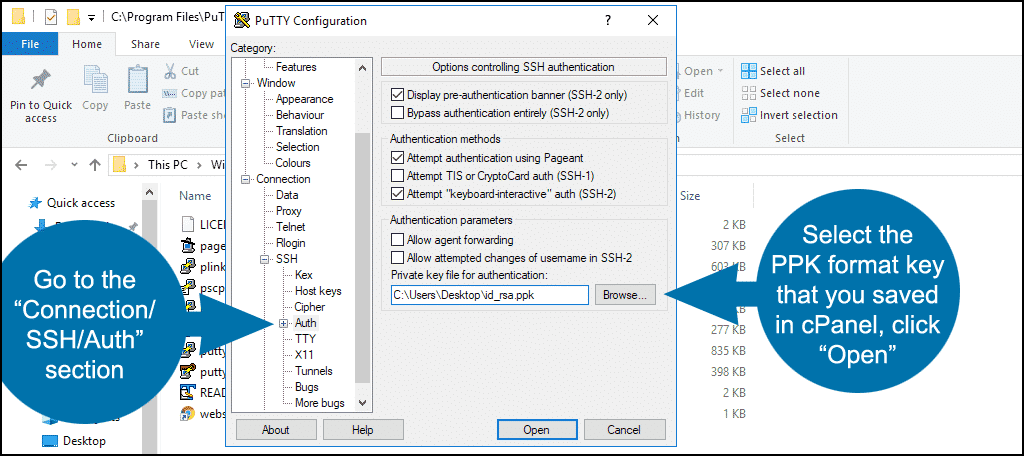
Go to the “Connection/ SSH/Auth” category. Select the PPK format key that you saved in cPanel and click the “Open” button.
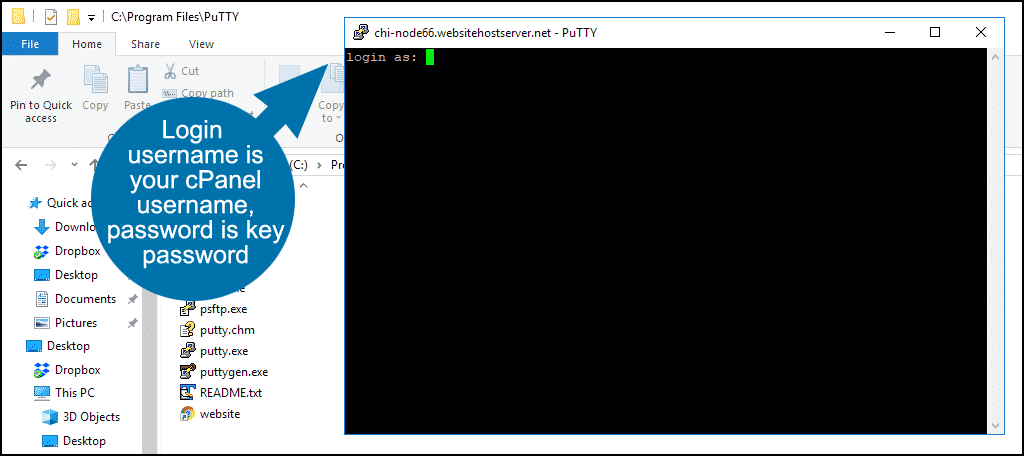
A shell window will open. The “login as” username is your cPanel username, and the password is the password or passphrase you specified during key generation.
WARNING: Excercise caution when accessing your account via the command line. Incorrect or incorrectly used commands can permanently change or delete permissions and files. If you do not have command line experience or are uncertain about a command, we suggest exploring alternatives to using the command line.