If you don’t want to split an account yourself, remember that GreenGeeks offers website migration for just $15 per site. Please open a ticket in GreenGeeks to request migration.
This article will show you how to split an Addon domain to its own cPanel account. Splitting an Addon domain to its own cPanel account is useful for, among others, Ecosite customers who have upgraded to a reseller or VPS web hosting account.
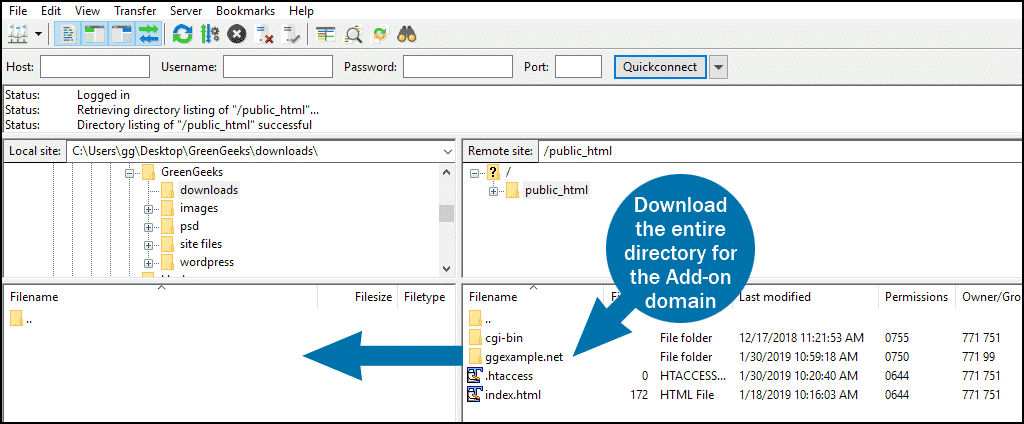
Download the existing content to your computer
Smaller sites can be archived using the cPanel File Manager.
For larger websites, use an FTP client to download the Addon domain directory (located in the /public_html directory) to your local computer.
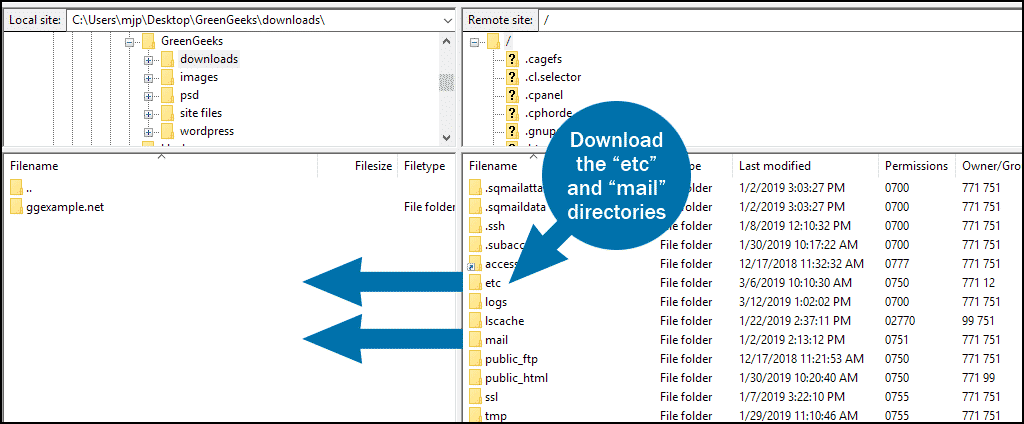
Download email directories
If you have email accounts on your Addon domain, go up one level from /public_html to / (your home directory) and download the “etc” and “email” directories.
If you don’t have any email accounts on your Addon domain that you need to copy, you can skip this step.
MySQL Databases
In addition to the files, most websites depend on a backend MySQL database that contains most of the content for the site, along with any configuration settings.
To do a complete migration, it’s necessary to copy over the existing MySQL DB to the destination account.
How to export databases using phpMyAdmin
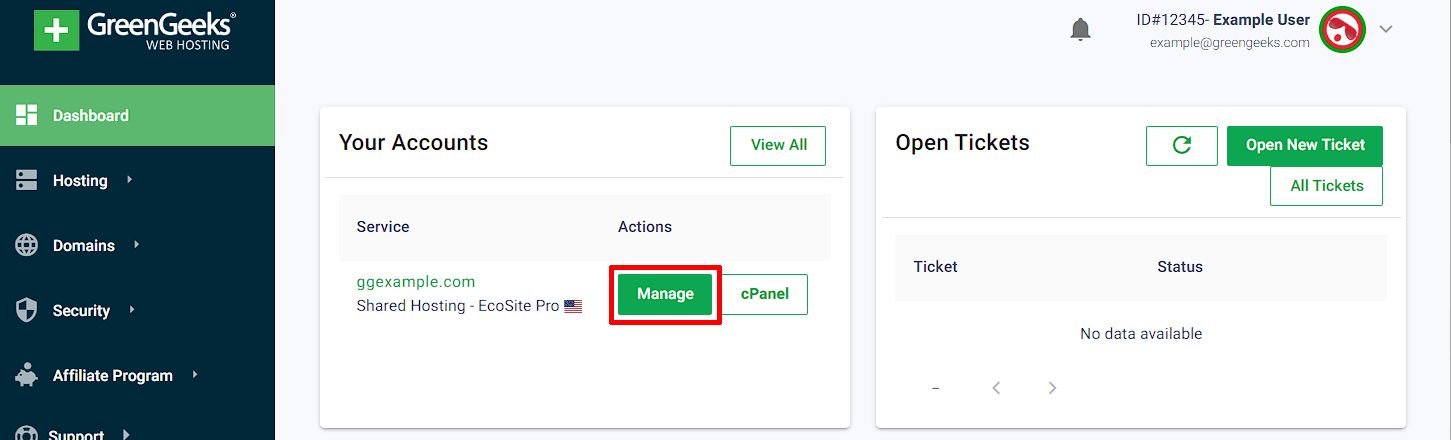
Method 1: Access phpMyAdmin from GreenGeeks Dashboard
After logging into the GreenGeeks Dashboard, click on the Manage button next to the hosting account, either on the GreenGeeks Dashboard home page, or the Hosting management tab.
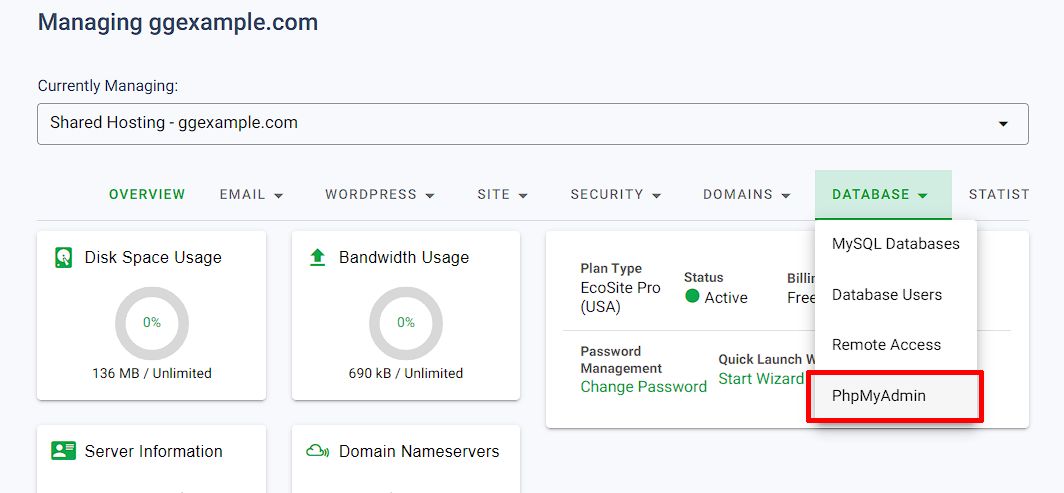
On the Hosting Account Management page in the Dashboard, select the Database drop-down menu, and click on the phpMyAdmin link.
Method 2: Access phpMyAdmin from cPanel
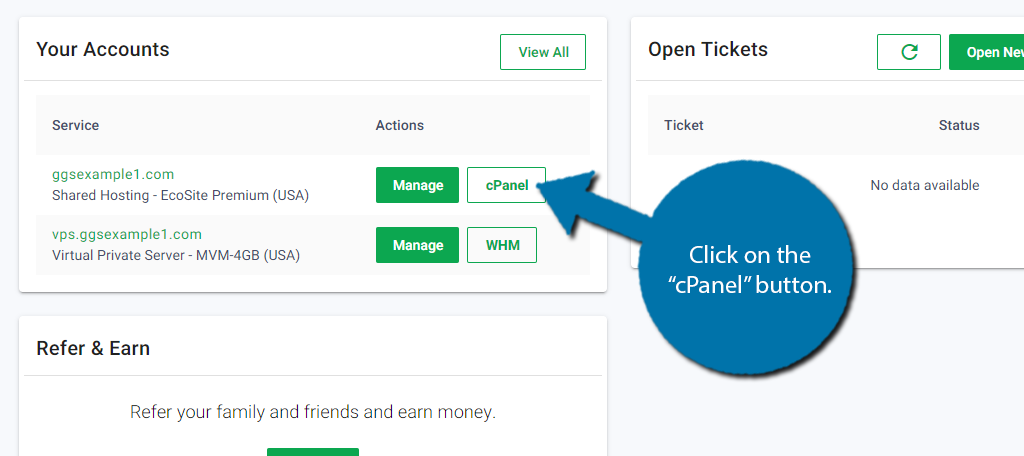
Log in to GreenGeeks and go to cPanel by clicking the “cPanel Login” button in the “Quick Server Login” section.
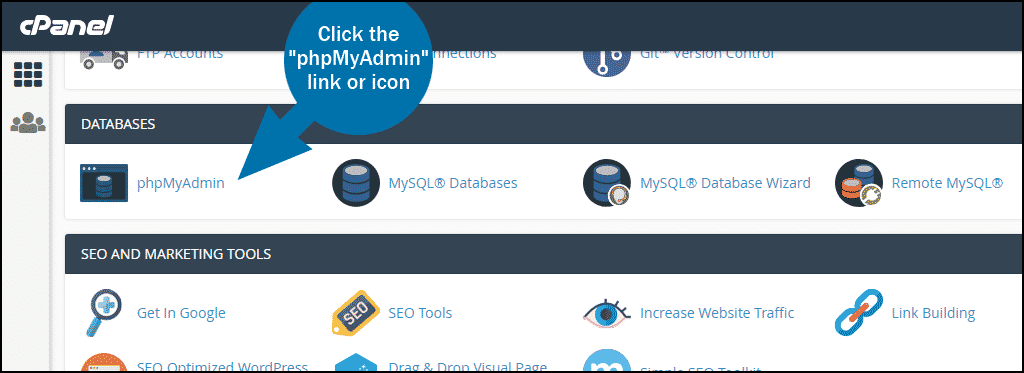
In the “DATABASES” section, click the “phpMyAdmin” link or icon.
phpMyAdmin Export MySQL Database
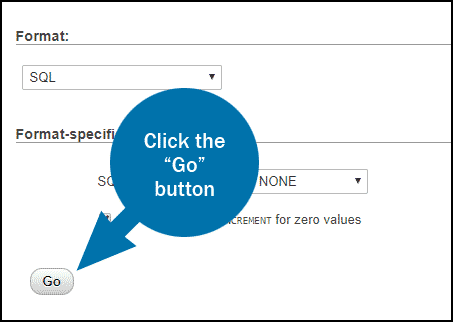
Inside of PHPMyAdmin, select the database you would like to export and click the “Export” tab at the top of the page.
Click the “Go” button to download a .SQL dump of database to your local computer.

Large MySQL databases dumps should be exported using the CLI mysqldump tool as this is more reliable for large files.
Remove the Addon domain
Instructions for removing Addon domains
Create the new cPanel Account
Instructions for creating a new cPanel account.
Upload the website files, mail, and etc folder
Upload the copy of your website files that you downloaded to your computer to the new /pubic_html folder.
If there are email accounts to be copied, upload the mail and etc folders to / (your home directory).
phpMyAdmin Import MySQL Database
Before you can import a copy of your website database (if you have one) into the new account, you first have to create a new, empty database in the new account (here are instructions for creating a new database in cPanel).
Once you’ve created the new empty database, go to the “DATABASES” section of cPanel and click the “phpMyAdmin” link or icon.
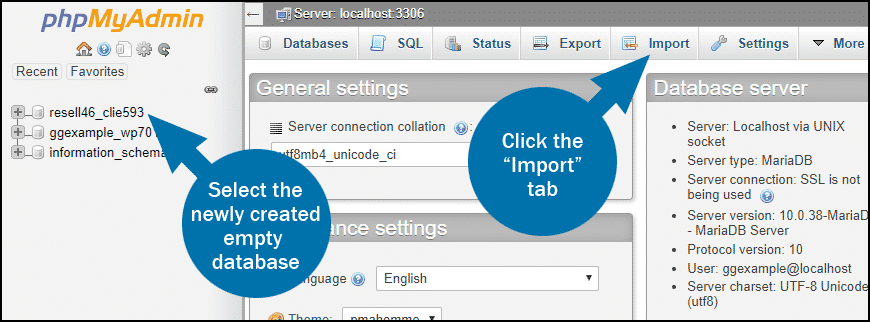
In phpMyAdmin, select the new empty database and click the “Import” tab.
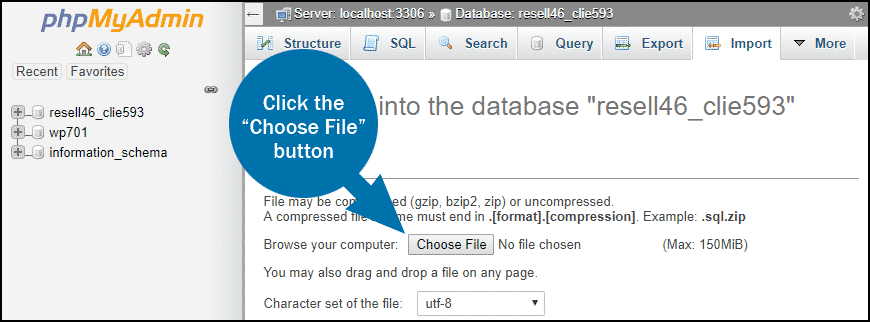
Click the “Choose File” button, select the downloaded copy of the database on your computer.
Click the “Go” button to import the database.
Large MySQL databases dumps should be imported using the CLI mysql client as this is more reliable for large files.
Update configuration files
For websites that depend on a MySQL database, in addition to the MySQL database there are configuration file(s) that will need to be updated to reflect the new MySQL database details and other changed variables such as the file paths.
The exact configuration file(s) to be updated depends on the type of Website; for WordPress sites the wp-config.php is the file to be updated with new database information.
Once the MySQL database information is updated in the configuration file, you’re all set and the website migration is complete.
Migration Assistance
The GreenGeeks Technical Support team is unable to assist with the customer migrations beyond basic troubleshooting.
If you need assistance with a website migration, GreenGeeks offers a migration service and we can complete the whole process for you, for a nominal fee.
Refer to the related Support Article for information about the GreenGeeks Migration Policy.